This guide walks you through setting up Treasure AI Voice and using it day-to-day — from installing the mobile app to leveraging AI-powered transcription and summarization.
Download the Treasure AI Voice mobile app from your device's app store.
Requires iOS 18 or later. iOS 26 or later is recommended.
Treasure AI Voice is not officially supported on iPad. It may be installable for proof-of-concept purposes, but you may encounter layout issues or unstable behavior.
Scan the QR code or tap the badge to download from the App Store.

After installation, go to Settings > Treasure AI Voice and enable Bluetooth.
Never connect a personal PLAUD device — including one you already use with the consumer app — to Treasure AI Voice, and never install the consumer app on a phone that also runs Treasure AI Voice. Each device can only be bound to one account/app at a time, and mixing consumer and enterprise usage on the same device isn't supported — recording retention and compliance controls depend on the device being bound solely to your organization's Treasure AI Voice account. If you need to move a device between apps, unbind it first through the owning app's normal unbind flow.
The Android version of Treasure AI Voice is currently under development. Stay tuned for availability on Google Play.
Then launch the app and sign in.

Two sign-in methods are available:
- Sign in with Google: Tap Sign in with Google and authenticate with your organization's Google Workspace account.
- Email / Password: Tap the link in the invitation email sent by your administrator. This opens the account creation screen. Enter your full name and a password, then tap Create Account. A verification code will be sent to your email address — enter it to activate your account.
Your password must meet all of the following requirements:
- At least 8 characters
- At least one uppercase letter (A–Z)
- At least one lowercase letter (a–z)
- At least one number (0–9)
- At least one symbol (e.g.
!,@,#,$)
If the invitation email or verification code email doesn't arrive, check your spam or junk mail folder.
For a step-by-step walkthrough with screenshots, see Account Activation.
Contact your administrator if you do not have credentials or encounter sign-in issues.
The app language is automatically set based on your smartphone's language setting. Supported languages: English and Japanese. If your smartphone is set to another language, the app defaults to English. You can override the language at any time from the Profile tab.
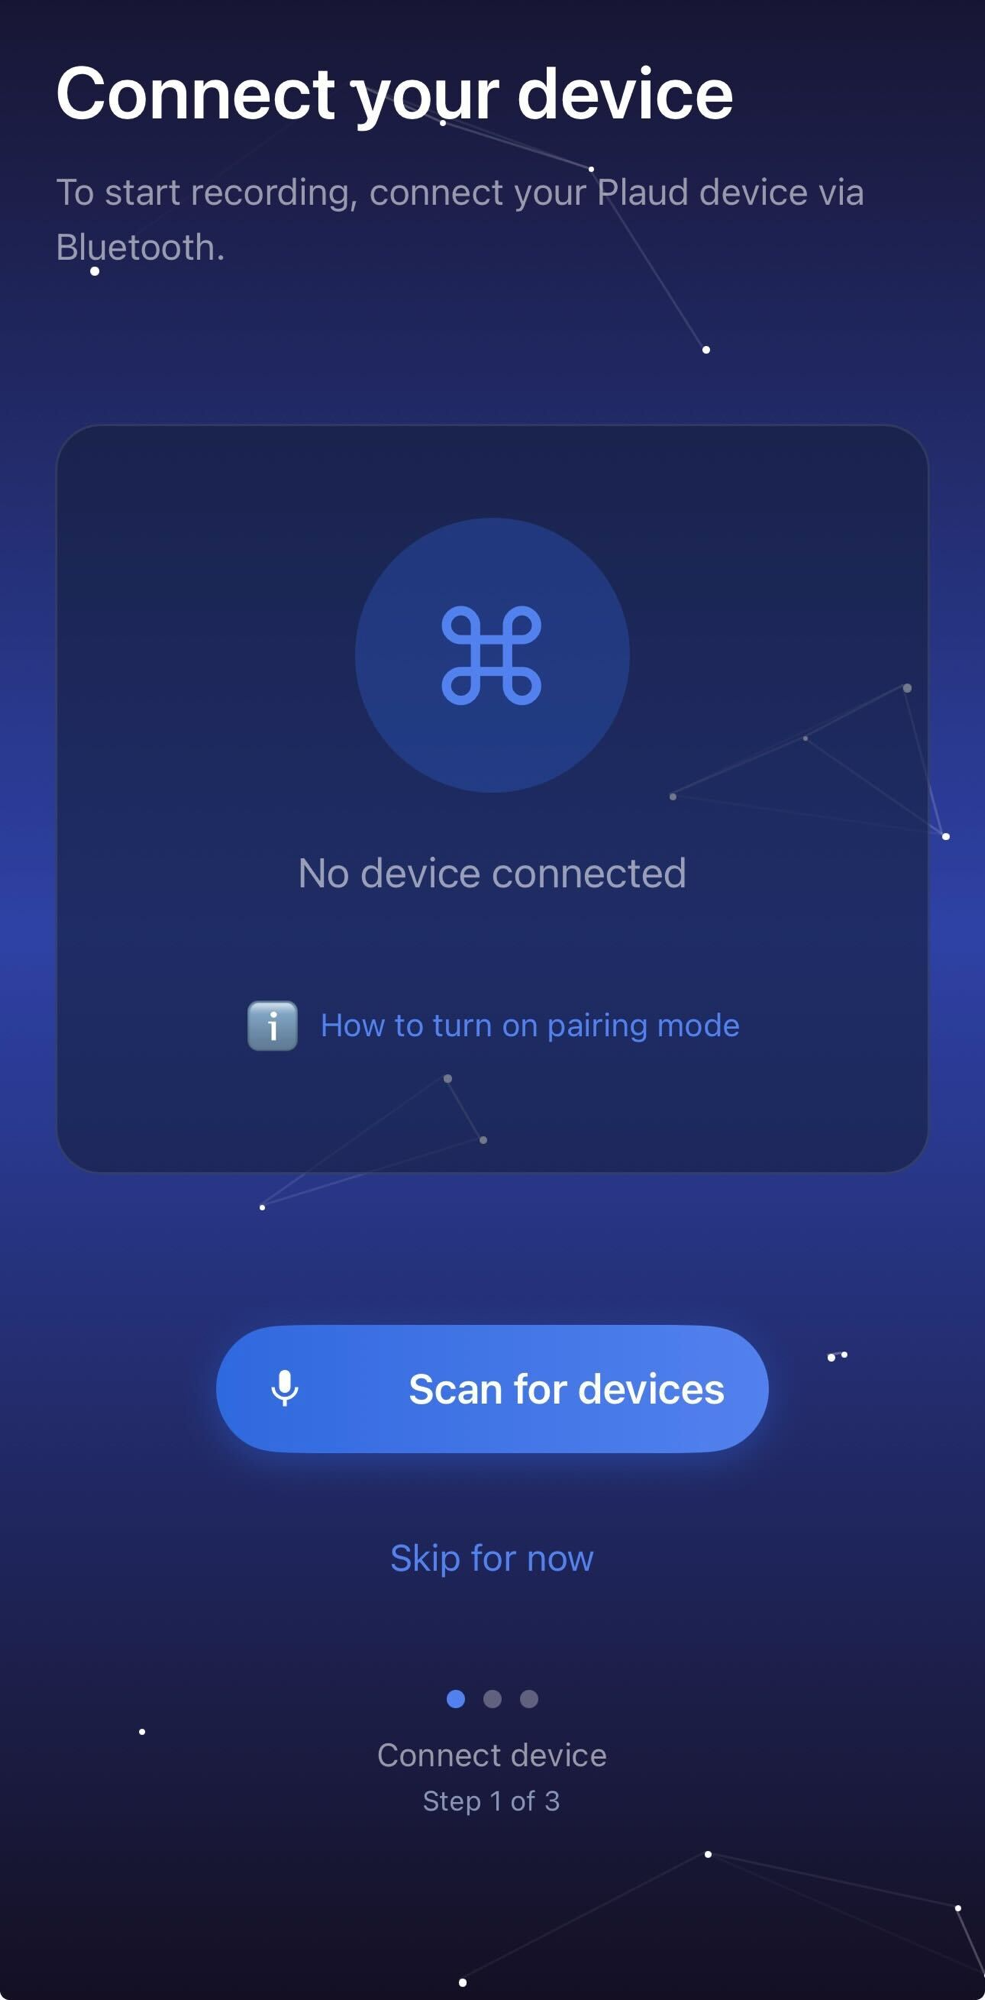
- Power on your PLAUD device:
- Note Pro: Press the recording button. The PLAUD logo will appear on the display.
- NotePin S: Press and hold the recording button until the white light starts blinking, then release. The device is now ready to connect.
- Open the Treasure AI Voice mobile app.
- Tap Scan for devices. The app will search for nearby PLAUD devices via Bluetooth.
- Select your device from the list.
- Follow the on-screen prompts to complete pairing.
Once paired, the device is linked to your account and ready to record.
Note Pro: Move the device closer to your smartphone and try scanning again.
NotePin S: Move the device closer to your smartphone, confirm the white light is blinking, and try pressing and holding the recording button again (step 1) before scanning.
Each PLAUD device is assigned to a single user account. If your organization uses bulk provisioning, your device may already be pre-assigned by your administrator.
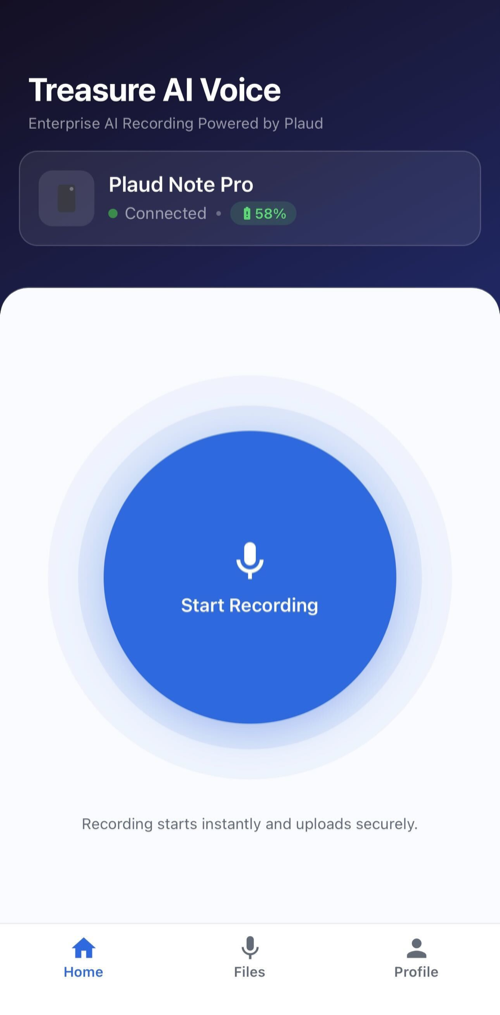
You can start and stop recordings from either the PLAUD device or the mobile app.
- From the device: Long-press the physical button to start recording. Long-press again to stop and save.
- From the app: Tap Start Recording on the home screen. Tap Stop Recording to end the session.
Syncing looks like a single step, but it actually happens in three stages behind the scenes:
- Device → App: The recording is pulled from the PLAUD device to the mobile app.
- App → Transcription: The app sends the audio for transcription.
- App → Cloud Storage: The app uploads the audio file to Treasure AI's secure cloud storage (S3).
A recording isn't fully synced until all three stages finish — don't assume it's done as soon as the transfer from the device to the app completes.
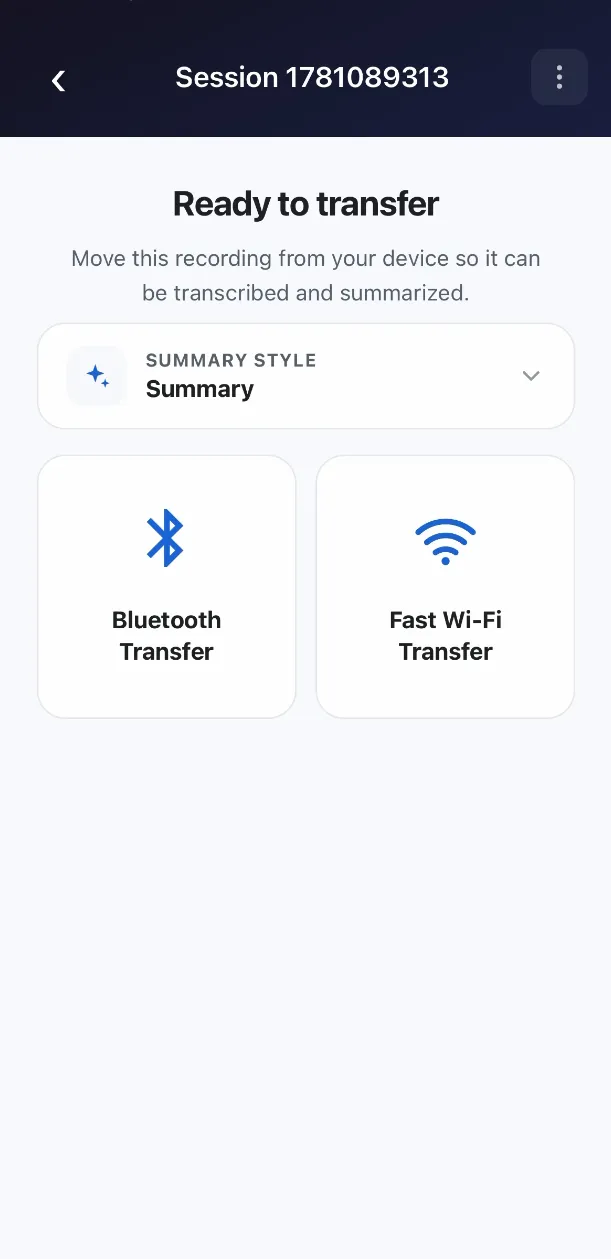
To sync a recording:
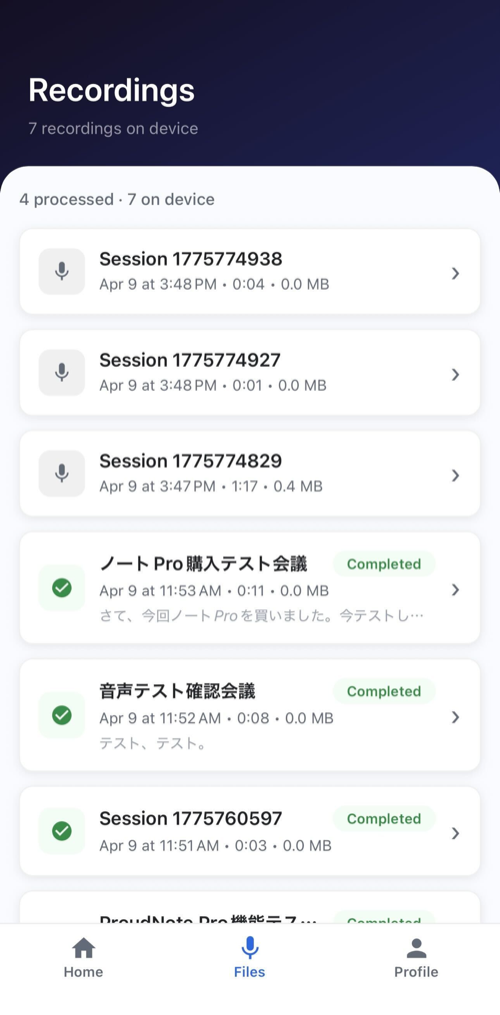
- Open the Treasure AI Voice mobile app and go to the Files tab.
- Select a recording from the list to open its detail screen.
- Choose how to pull the audio file from the device:
- Transfer over Wi-Fi (recommended) — Faster and more stable than BLE. The app briefly joins the PLAUD device's local hotspot, downloads the file, then closes the hotspot.
- Transfer over BLE — Pulls the file over Bluetooth Low Energy. Slower and less stable than Wi-Fi, but works on every supported phone and device combination.
- The app then runs the recording through the rest of the pipeline:
- Upload: The app encrypts and uploads the file to Treasure AI's secure cloud storage.
- Transcribe: The audio is transcribed with speaker diarization and language detection.
- Summarize: AI-generated summaries and action items are produced.
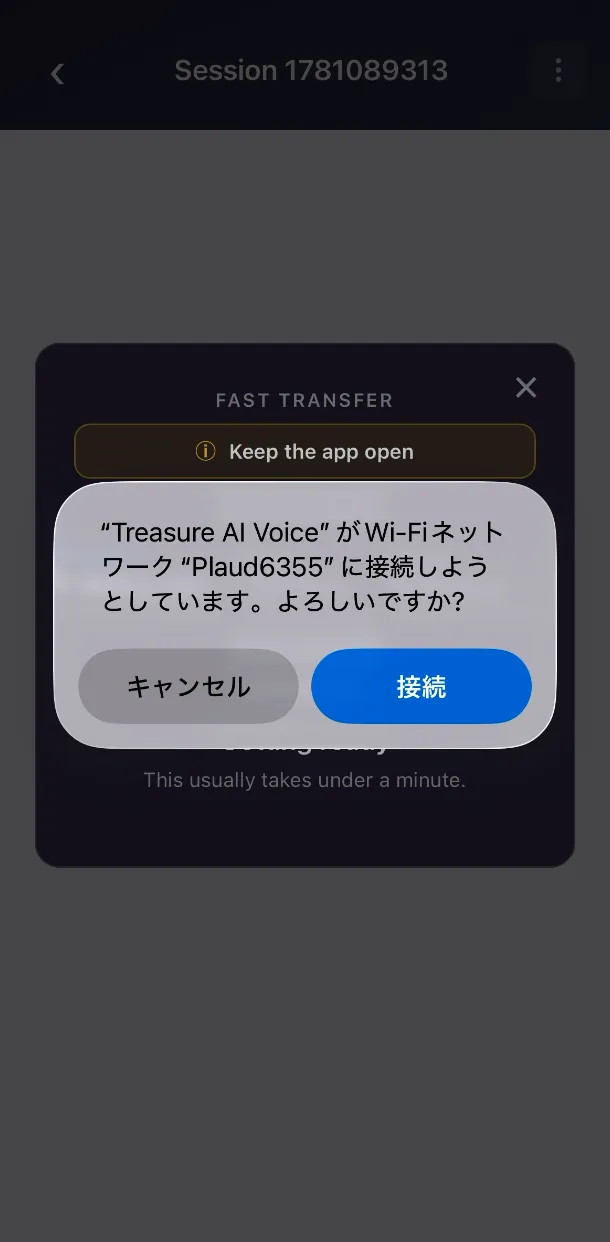
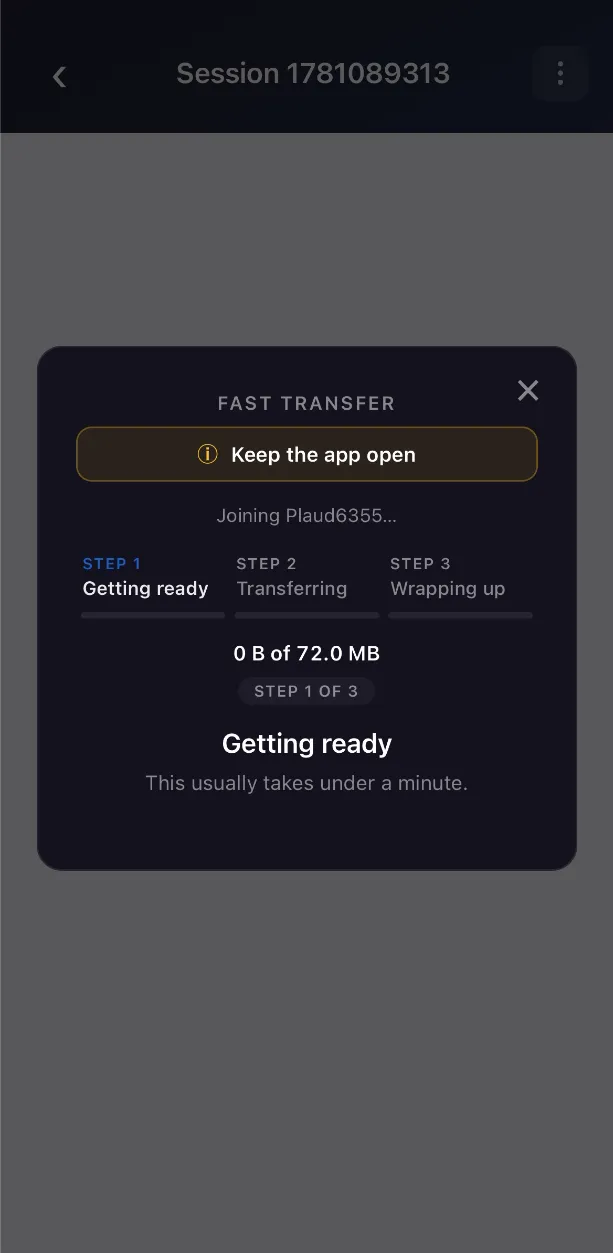
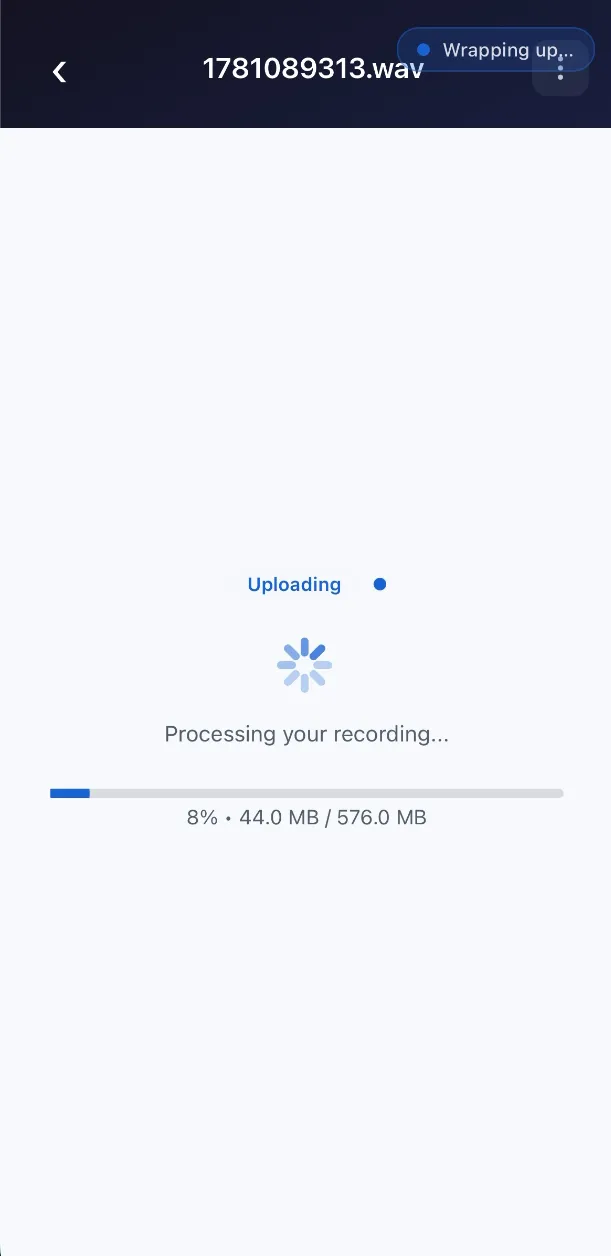
A Wi-Fi transfer confirms the connection to the device's hotspot, then runs through Getting ready, Transferring, and Wrapping up. Once the transfer finishes, the recording detail screen shows upload progress while the file moves to cloud storage.
The device-to-app transfer (step 3 above) fails if the app is moved to the background, and you'll need to start it again. This step usually finishes within a few minutes unless the recording is very long — avoid opening other apps, including checking a messenger notification, until it completes.
Once the transfer to the app finishes, the remaining steps — sending the audio for transcription and uploading it to cloud storage — can continue safely in the background.
Audio files are uploaded directly from the mobile app to Treasure AI's secure cloud storage. Files are never stored on PLAUD's servers, ensuring full data sovereignty for your organization.
To sync several recordings at once:
- On the Files tab, tap the menu in the top-right corner and choose the multi-select option (currently Select files to transfer (max 5)).
- Select the recordings you'd like to sync, then choose how to pull them from the device (Wi-Fi or BLE, as above).
Once a recording is uploaded and processed, the file detail screen shows the full transcript alongside the recording's Key Topics, Summary, and Action Items:
- Speaker Diarization: The AI automatically separates and identifies different speakers in the conversation. You can tap a speaker label to edit and assign a name.
You can also delete recordings from the same screen:
- Delete cloud recording: Deletes the recording from cloud storage. The recording remains on the PLAUD device.
- Delete from device: Deletes the recording from the PLAUD device only. The recording remains in cloud storage.
Treasure AI Voice generates multi-dimensional AI summaries powered by large language models. After a recording is transcribed, the file detail screen displays the following outputs together in the same list:
A structured overview of the conversation, highlighting the main topics discussed, key points raised by each participant, and the overall outcome of the meeting.
A list of follow-up tasks extracted from the conversation, including:
- What needs to be done
- Who is responsible (when identifiable from the conversation)
- Any deadlines or timelines mentioned
To customize the format and structure of summaries per recording, use Summary Templates. Choose from three built-in templates (Summary, Meeting Notes, Structured), or create your own to match your specific use case.
For details, see Summary Templates.
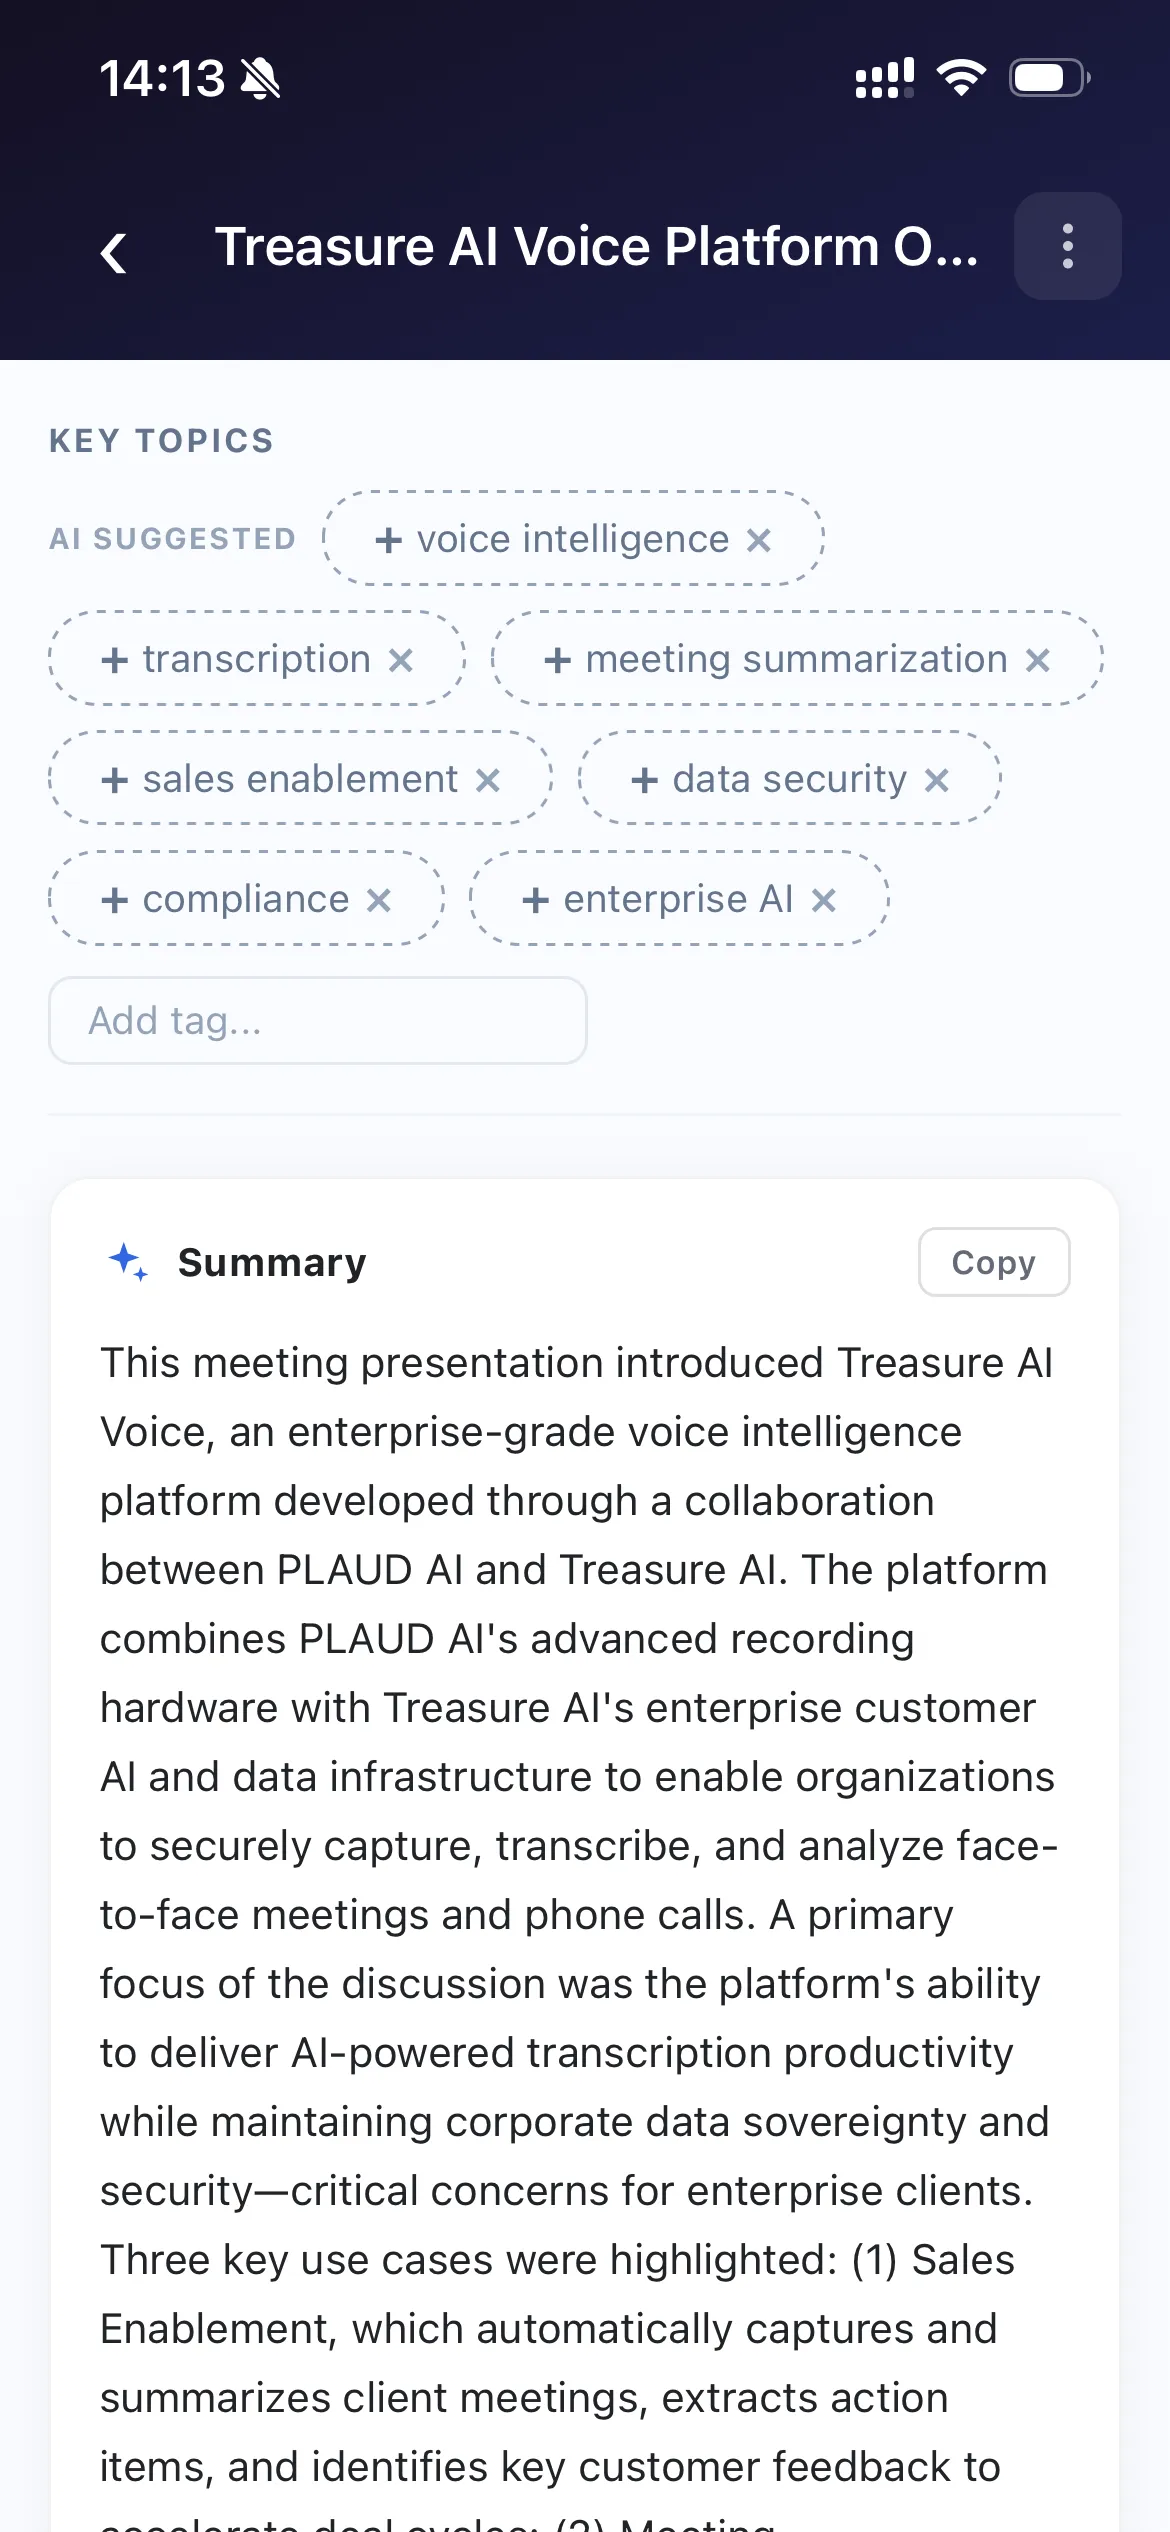
Each recording can carry up to 10 tags of up to 50 characters each. Tags appear under the Key Topics section on the file detail screen and on the AI Voice Console's Recordings page.
There are two kinds of tags:
- Suggested tags — Generated automatically from the transcript after summarization. Shown alongside applied tags with a distinct style.
- Applied tags — Tags attached to the recording, either by promoting a suggested tag or by typing your own. Custom tags can be anything you find useful (project codes, customer names, meeting types, etc.). Applied tags are what the AI Voice Console filters on.
From the file detail screen, you can:
| Action | Description |
|---|---|
| Apply a suggested tag | Tap the + on a suggested tag to promote it to an applied tag. |
| Dismiss a suggested tag | Tap the × on a suggested tag to hide it from this recording's suggestions. |
| Add a custom tag | Type a new tag in the Add tag field and submit. Maximum 50 characters. |
| Remove an applied tag | Tap the × on an applied tag. |
You can edit tags on recordings you own. Enterprise Admins can also edit tags on any recording in their organization from the AI Voice Console.
Each PLAUD device can only be bound to one account at a time (see One User Per One Device in Pair Your PLAUD Device). Unbinding releases the connection between your account and the device so another person can bind it to their own account.
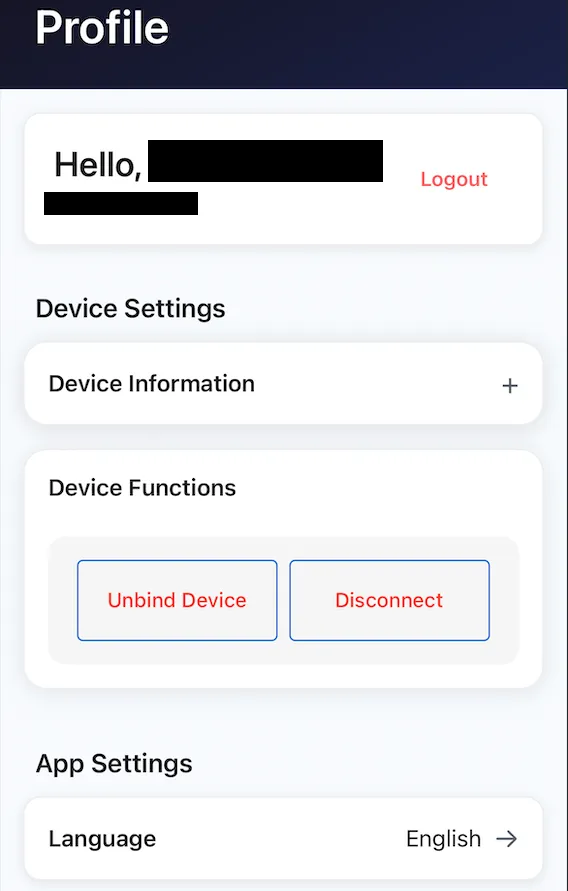
- Open the Treasure AI Voice mobile app and go to the Profile tab.
- Under Device Functions, choose Unbind Device (not Disconnect — see below for the difference).
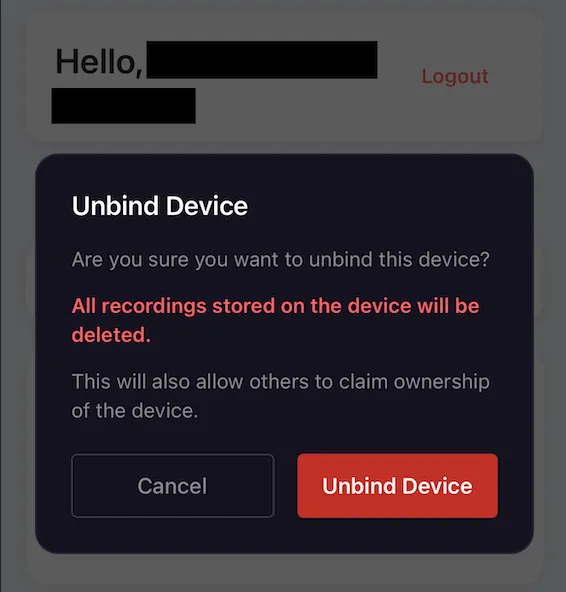
- Review the warning message, which explains that any recordings still on the device will be deleted.
- Tap Unbind Device to confirm, or Cancel to back out.
- The device is released from your account. Anyone else in your organization can now bind it to their own account.
Unbinding permanently deletes any recordings still stored on the device that haven't been synced to the app yet. Sync everything you want to keep before unbinding.
When reassigning a device to a different employee (e.g., offboarding or a hardware swap), the previous owner must complete the unbind step themselves, on their own smartphone — this cannot be done on their behalf by an administrator. Confirm the outgoing employee has synced any recordings they need and unbound the device before it is passed on or reshipped.
- Unbind Device permanently releases the device from your account (and erases any unsynced recordings on it) so someone else can bind it.
- Disconnect only ends the current Bluetooth connection temporarily — the device stays bound to your account and reconnects normally the next time it's in range.