Pages and content spots define where personalized content appears on your website. A page is a registered website URL, and a content spot is a specific DOM element on that page where personalized content can be displayed. Pages and content spots are managed under the Assets area in Personalization Studio.
Pages and content spots are registered once and reused across all campaigns.
Before registering pages, ensure:
- The Web SDK is installed on your website.
- Browser security workarounds are configured (required for the Visual Selector).
- Target DOM elements have stable HTML
idattributes.
Before registering pages, the Web Developer and Digital Marketer should align on which pages and content areas to personalize. The Digital Marketer understands campaign goals and which page areas drive conversions; the Web Developer understands the DOM structure and element stability.
- Navigate to Assets > Pages in Personalization Studio.
- Click Add Page.
- Enter a page name — must be unique across all of Personalization Studio.
- Enter the exact page URL — single URL only, no wildcards (for example,
example.com/products/shoes, notexample.com/products/*). - Click Open Visual Selector — your website loads in an embedded view.
- In the Visual Selector, click on DOM elements you want to personalize. The selector targets elements by their
idattribute. - Name each content spot with a descriptive label (for example, "Hero Banner", "Sidebar CTA", "Welcome Text").
- Click Save — the page and its content spots are now available in the campaign wizard.
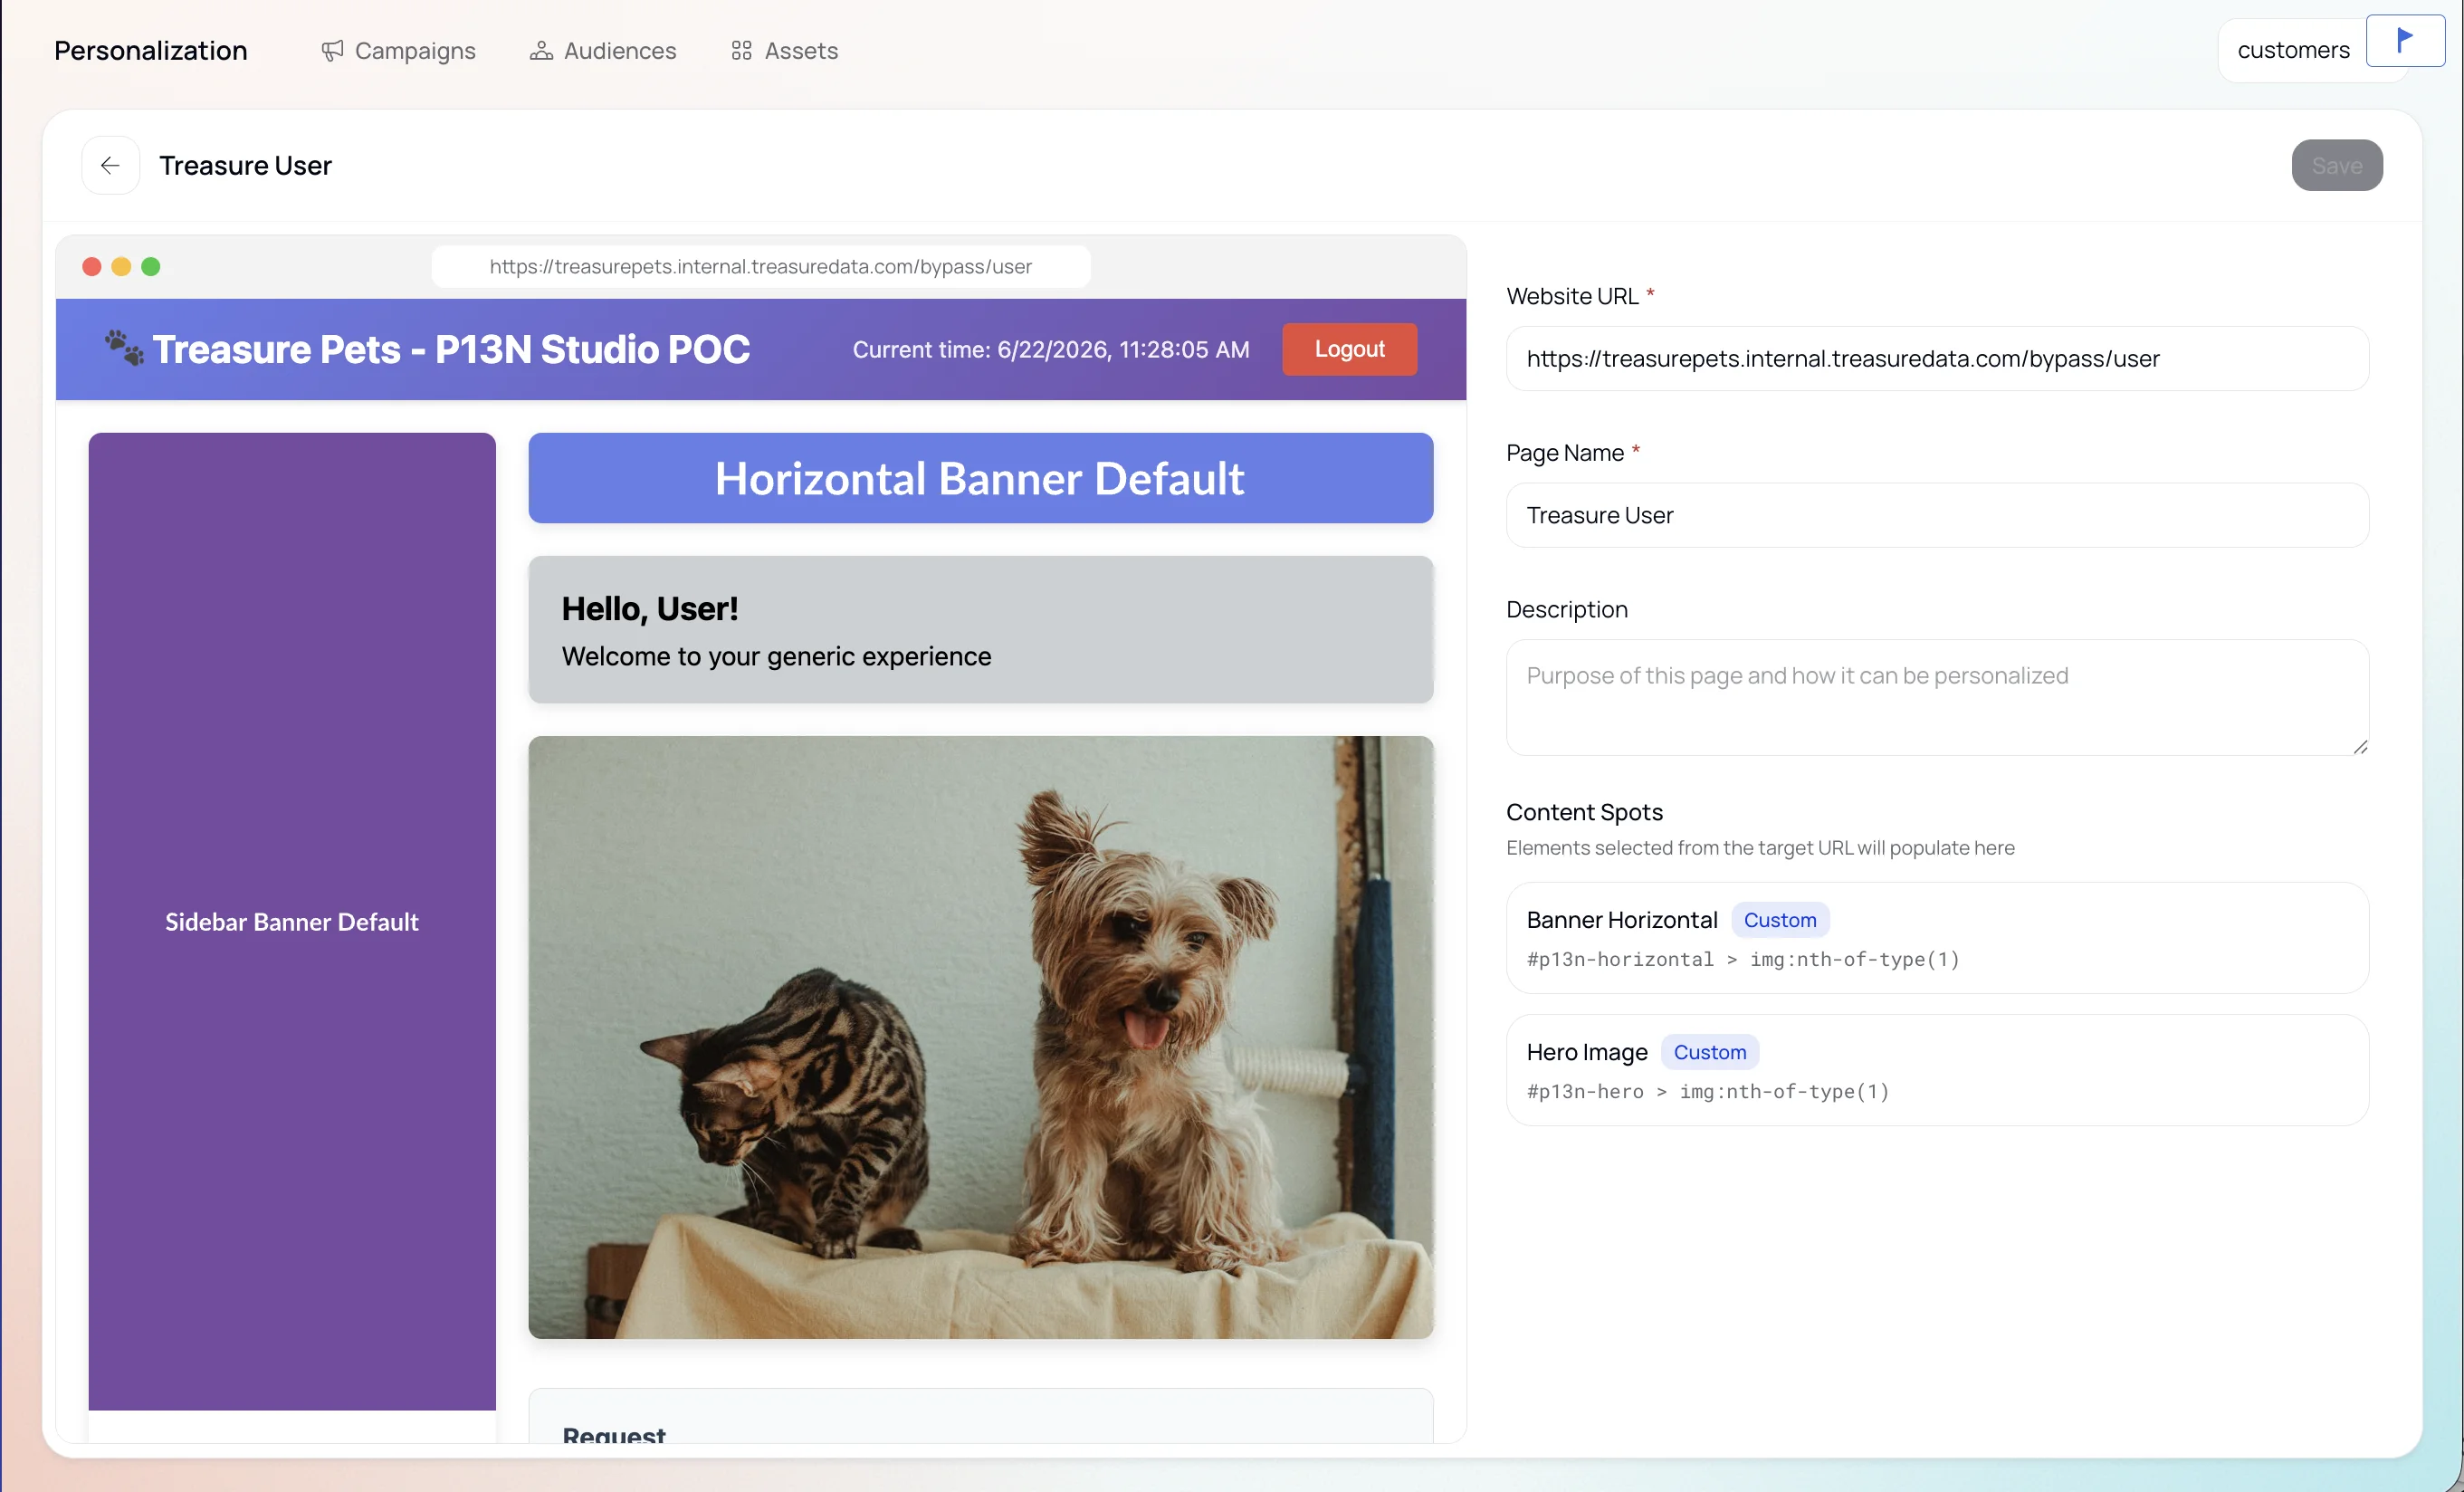
The Visual Selector is the primary tool for identifying content spots. When you open the Visual Selector:
- Your website loads in an embedded view within Personalization Studio.
- Click on any DOM element to select it as a content spot.
- Each selected element is identified by its HTML
idattribute. - Give each content spot a human-readable name that describes its purpose.
| Do | Don't |
|---|---|
Use elements with stable id or class attributes. | Rely on elements without IDs (positional selectors can break). |
| Test content spots on a staging environment before production. | Assume spots work without verification. |
| Validate content spots with your Digital Marketer after selection. | Register spots without stakeholder alignment. |
Personalization Studio enforces referential integrity for pages and content spots:
- Pages and content spots referenced by active campaigns cannot be deleted. The system blocks deletion and lists the campaigns that reference them.
- Deleting a page removes all its content spots.
- Creative assets (images) are not cascade-deleted — they are independent objects.
Single Page Applications (SPAs) are not currently supported. The Visual Selector works with traditional server-rendered pages where each URL maps to a single page state.