Engage Studio supports LINE Official Account (LINE OA) as a campaign channel alongside Email and Mobile Push. This guide covers how to create a one-off campaign that delivers LINE messages to your audience.
Before creating a LINE campaign, ensure you have completed the LINE setup:
- A LINE Sender Account configured in Engage Studio > Configurations > LINE OA Configurations
- The LINE Sender Account assigned to your workspace
- Customer profiles with LINE User IDs in Treasure Data CDP
See LINE Official Account Setup for details.
- In Engage Studio, navigate to Campaigns.
- Click + New Campaign.
- Enter a campaign name, select LINE Official Account as the campaign type, and click Create.

The campaign details page opens with five tabs:
| Tab | Description |
|---|---|
| Target Audience | Define the segment to receive the campaign |
| Campaign Content | Compose LINE messages and select the LINE Sender Account |
| Delivery Schedule | Configure send time (immediate or scheduled) |
| Activation | Review activation settings and retry policy |
| UTM Tracking | Set UTM parameters to append to all links |
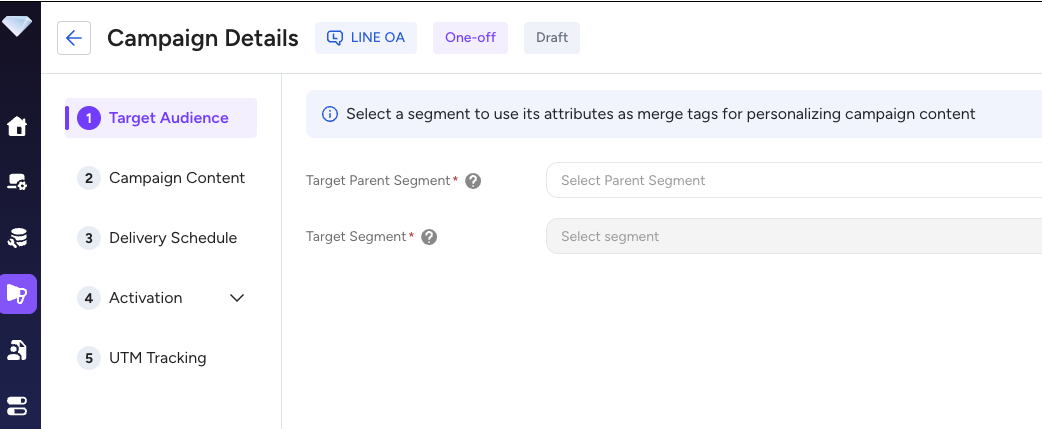
Specify which segment of your customers should receive the LINE campaign.
- Click + Add Segment and select a segment from Audience Studio.
- The campaign targets all profiles in the segment that have a LINE User ID stored in their CDP profile.
Profiles without a LINE User ID are excluded from delivery. Each excluded profile is recorded in the delivery log with an error reason of missing_recipient_id. Review your segment's LINE User ID coverage before launch to estimate effective reach.
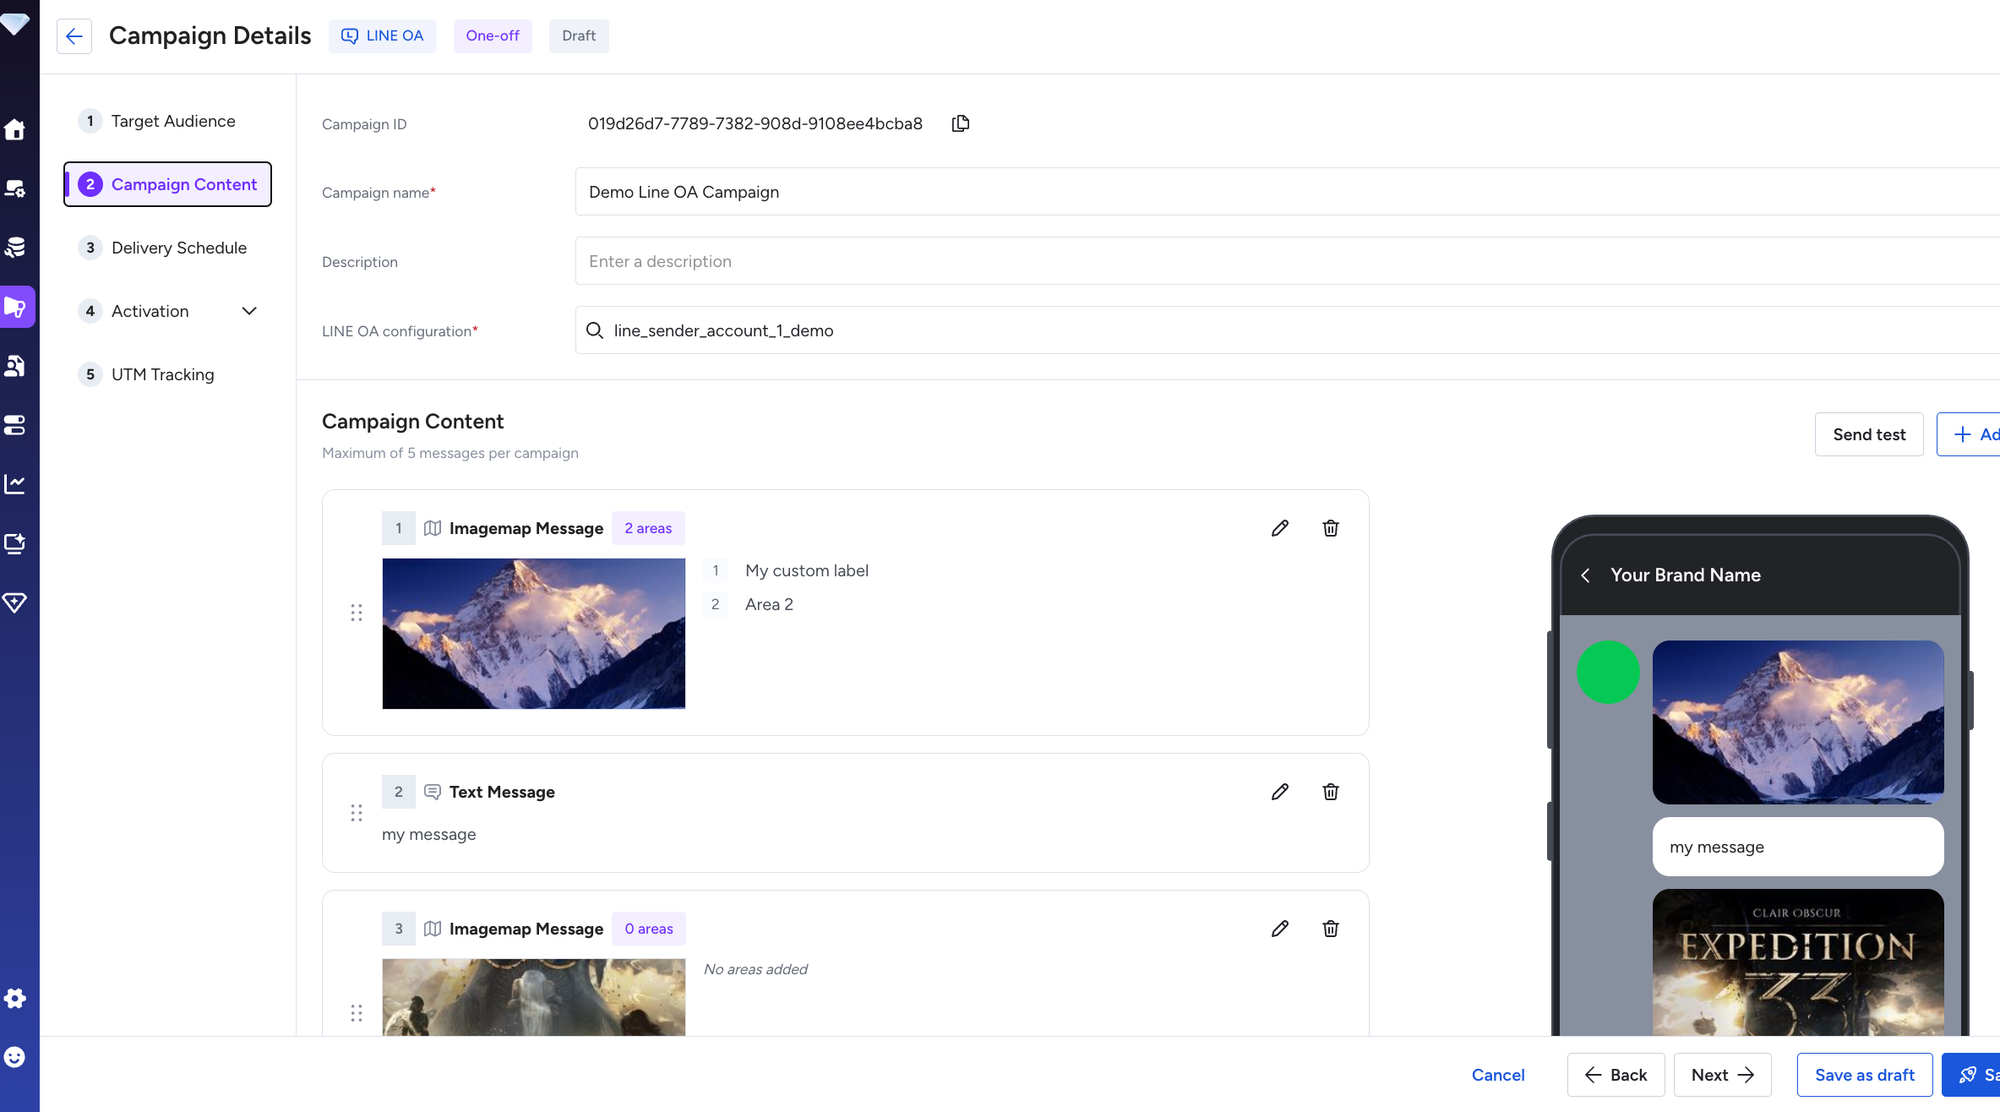
The Campaign Content tab is where you compose your LINE messages and select the sender account.
From the LINE OA configuration dropdown, select the LINE Official Account to send from. Only LINE Sender Accounts assigned to your current workspace appear in this list.
You can include up to 5 message objects in a single campaign delivery. Each message object is sent as part of a single API call to LINE (a multi-message bundle).
To add a message:
- Click + Add Message.
- Select a message type: Text or Imagemap (additional types coming in future releases).
- Configure the message content (see Supported Message Types for field details).
- Repeat to add additional messages.
You can reorder messages by dragging them. Recipients receive all messages in the order they are arranged.
Each message object displays an inline preview. The preview shows the rendered appearance of the message as it will appear to LINE users on a standard smartphone screen.
Configure when the campaign is sent.
| Option | Description |
|---|---|
| Send Immediately | Delivery begins as soon as you launch the campaign |
| Schedule for Later | Specify a date and time for delivery to begin |
| Recurring (To Be Supported) | Send out on a regular basis. However, this is supported by the Always-On Campaign |
The Activation tab shows the execution configuration for the campaign. For LINE campaigns, messages are delivered through the Streaming Egress Connector (LINE OA Messaging Streaming Output).
Retry behavior is handled automatically by the connector:
- Transient errors (such as temporary LINE API unavailability) trigger automatic retries with exponential backoff.
- Permanent errors (such as invalid LINE User ID or deactivated account) are recorded as delivery failures without retry.
In Output Mapping, set the target column to the one that contains the LINE User ID. If your column is not already named line_user_id, enter line_user_id in the Output Column Name field as an alias.
UTM parameters are automatically appended to all URLs within your LINE messages.
Default values for LINE campaigns:
| Parameter | Default Value |
|---|---|
utm_source | line |
utm_medium | social |
utm_campaign | (empty — use {{campaign.id}} to populate with the campaign ID) |
You can override or add additional UTM parameters on this tab. Parameters are merged with any existing query string in the URL.
See Click Tracking for more information on how UTM parameters and click events are recorded.
- Review all five tabs for completeness.
- Click Launch (for immediate delivery) or Schedule (for scheduled delivery).
Before launch, Engage Studio validates:
- At least one message is configured
- A LINE Sender Account is selected
- The target segment is specified
- Messages conform to LINE API requirements (see Message Types for validation rules)
If validation errors are present, they are shown inline on the relevant tab. Fix all errors before launching.
| State | Description |
|---|---|
| Draft | Campaign is being drafted and has not been launched |
| Planned | Campaign is scheduled to launch at a future time |
| Active | Campaign is actively delivering messages |
| Finished | Campaign has successfully finished delivery |
| Suspended | Campaign was canceled or encountered an error before launching |
- Supported Message Types — Detailed configuration for Text and Imagemap messages
- Click Tracking — How UTM parameters and click events are tracked
- Reporting — View delivery results and engagement metrics
- Testing LINE Campaigns — Test before launch