You can write job results directly to your Google Cloud Storage.
- Basic knowledge of Treasure Data, including TD Toolbelt.
- A Google Cloud Platform account with specific permissions
If your security policy requires IP whitelisting, you must add Treasure Data's IP addresses to your allowlist to ensure a successful connection.
Please find the complete list of static IP addresses, organized by region, at the following document
List the Cloud Storage buckets. They are ordered in the list lexicographically by name.
To list the buckets in a project:
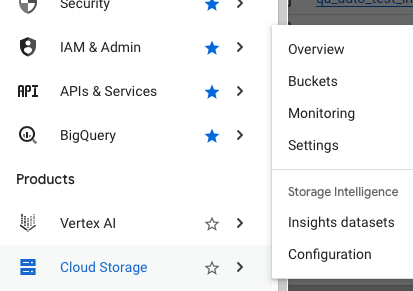
- Open the Cloud Storage browser in the Google Cloud Console.
- Select Cloud Storage on the left menu then choose Buckets
Buckets that are part of the currently selected project, appear in the browser list.
To create a new storage bucket:
- Open the Cloud Storage browser in the Google Cloud Console.
- Select Create bucket to open the bucket creation form.
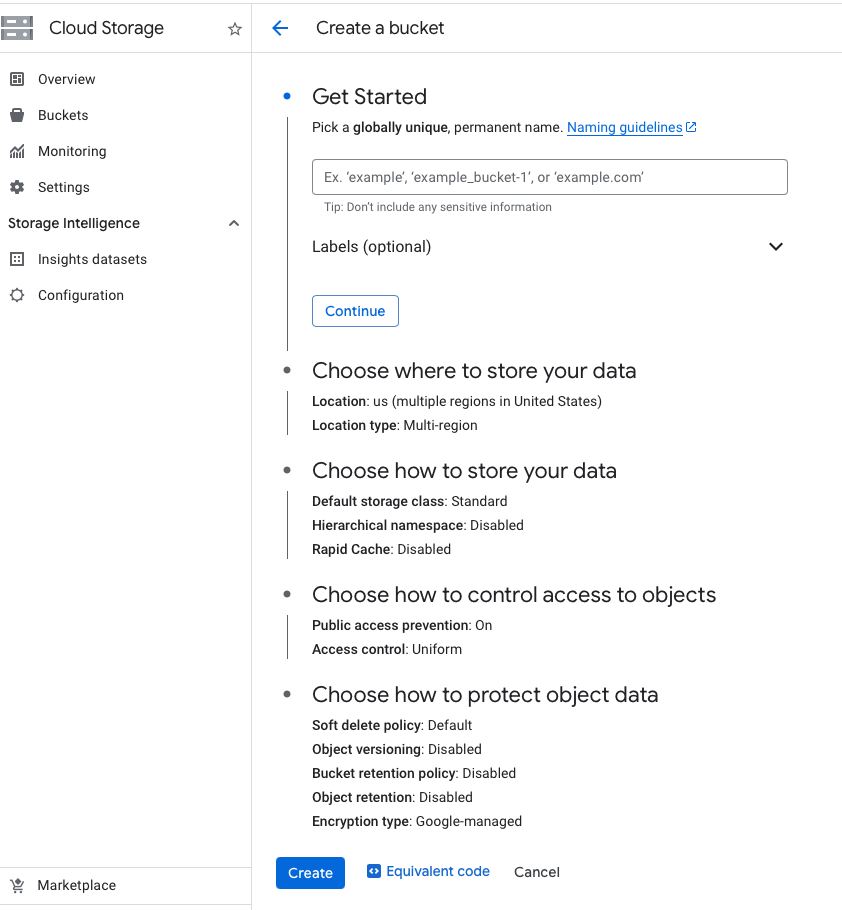
Enter your bucket information and select Continue to complete each step:
- Specify a Name, subject to the bucket name requirements.
- Select a Location type and Location where the bucket data will be permanently stored.
- Select a Default storage class for the bucket. The default storage class is assigned by default to all objects uploaded to the bucket.
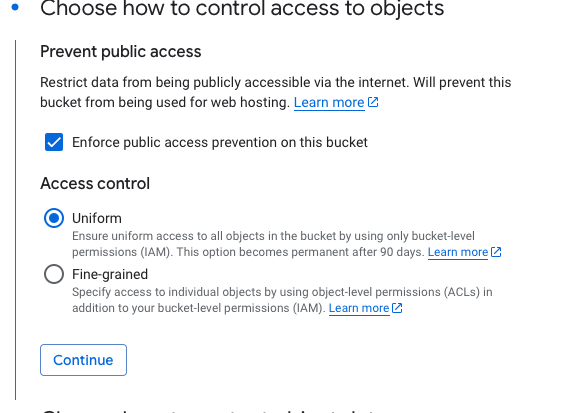
- Select an Access control model to determine how you control access to the bucket's objects. To support Workload Identity Federation please choose Uniform
- Optionally, you can set Data protection and Data encryption.
Select Create.
The integration with Google Cloud Storage is based on server-to-server API authentication.
The Service Account used to generate the JSON Credentials must have Storage Object User permissions.
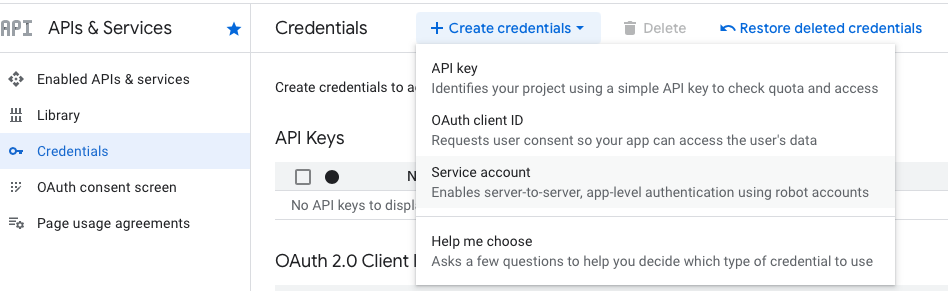
Visit your Google Developer Console.
Select Credentials under APIs & Services at the left menu.
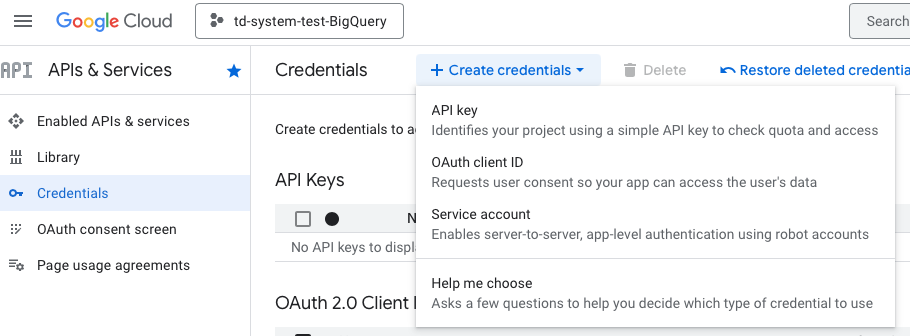
Select Create credentials then choose Service account:
From Permissions add Storage Object User Role.
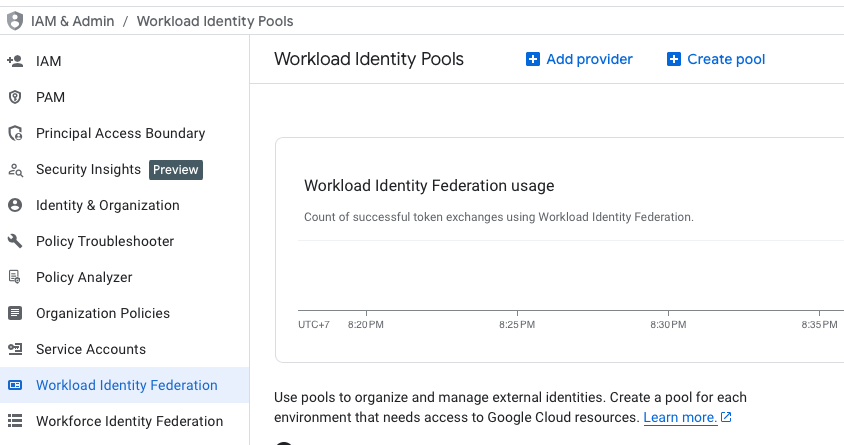
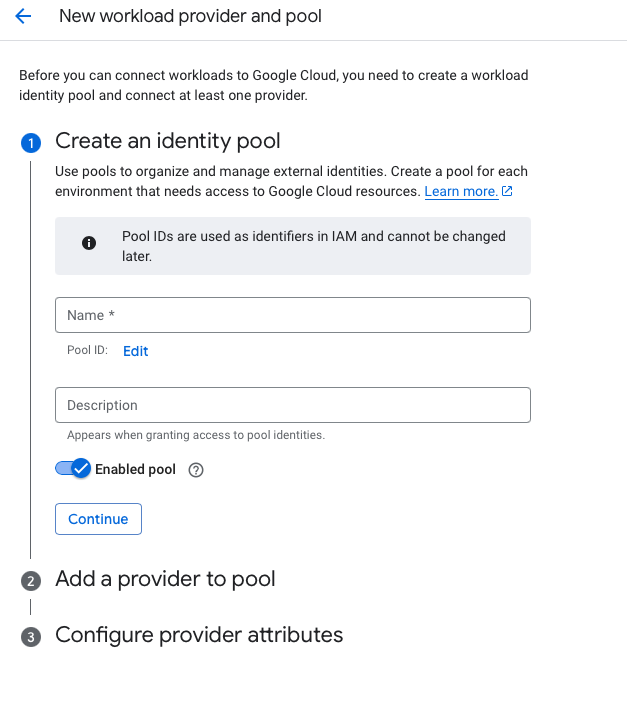
Select create pool under IAM & Admin / Workload Identity Pools or choose existing Pool
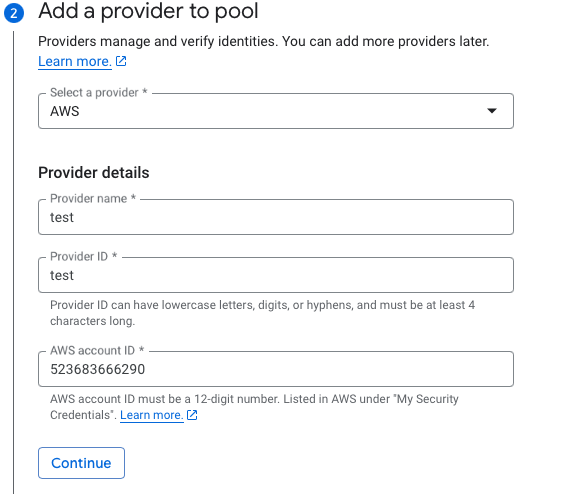
Add an AWS provider with account ID 523683666290
From Configure provider attributes click Add mapping. Add attribute with name attribute.account and value assertion.account then Save
From Workload Identity Pools select created pool then select Download config from Connected service accounts

Select AWS provider that created for account ID 523683666290 then click Download and store config file (Application default credential keyfile).
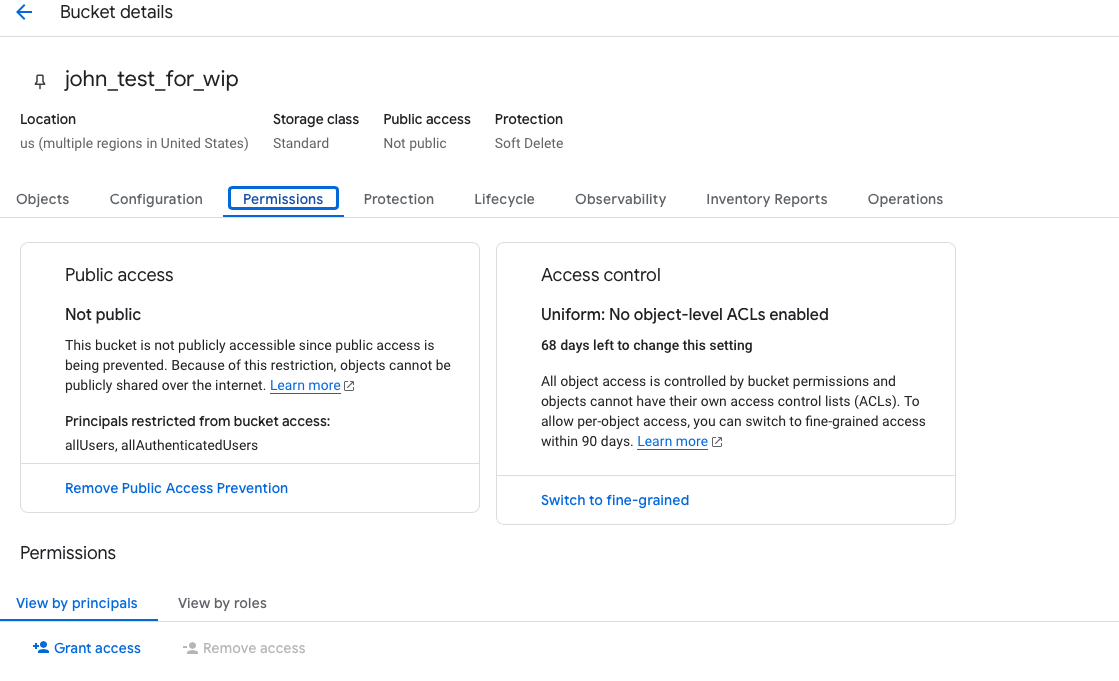
Select destination bucket from your buckets list then click permissions tab
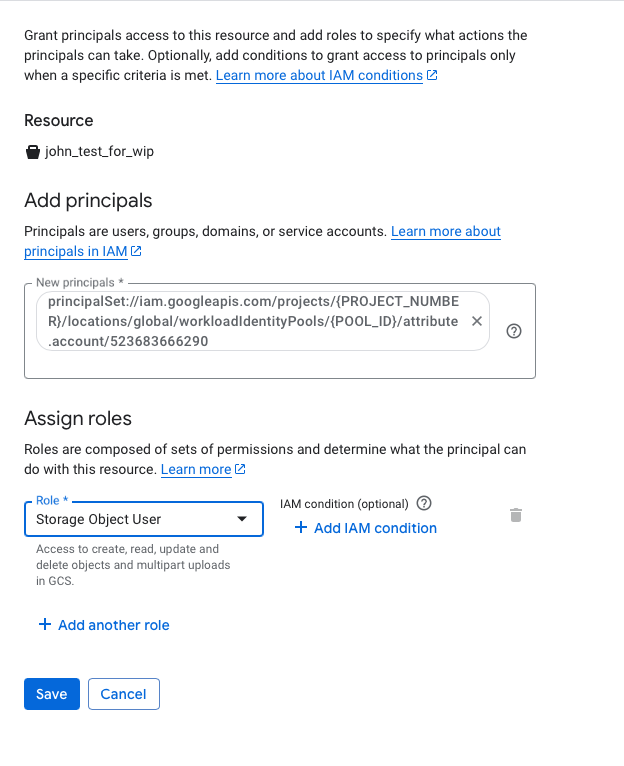
Click on Grant access then add Principals value principalSet://iam.googleapis.com/projects/{PROJECT_NUMBER}/locations/global/workloadIdentityPools/{POOL_ID}/attribute.account/523683666290 with roles Storage Object User
In Treasure Data, you must create and configure the data connection before running your query. As part of the data connection, you provide authentication to access the integration.
Open Treasure Console.
Navigate to Integrations Hub > Catalog.
Search for and select Google Cloud Storage V2.
Select Create Authentication.
Choose Authentication Method and input the credentials.
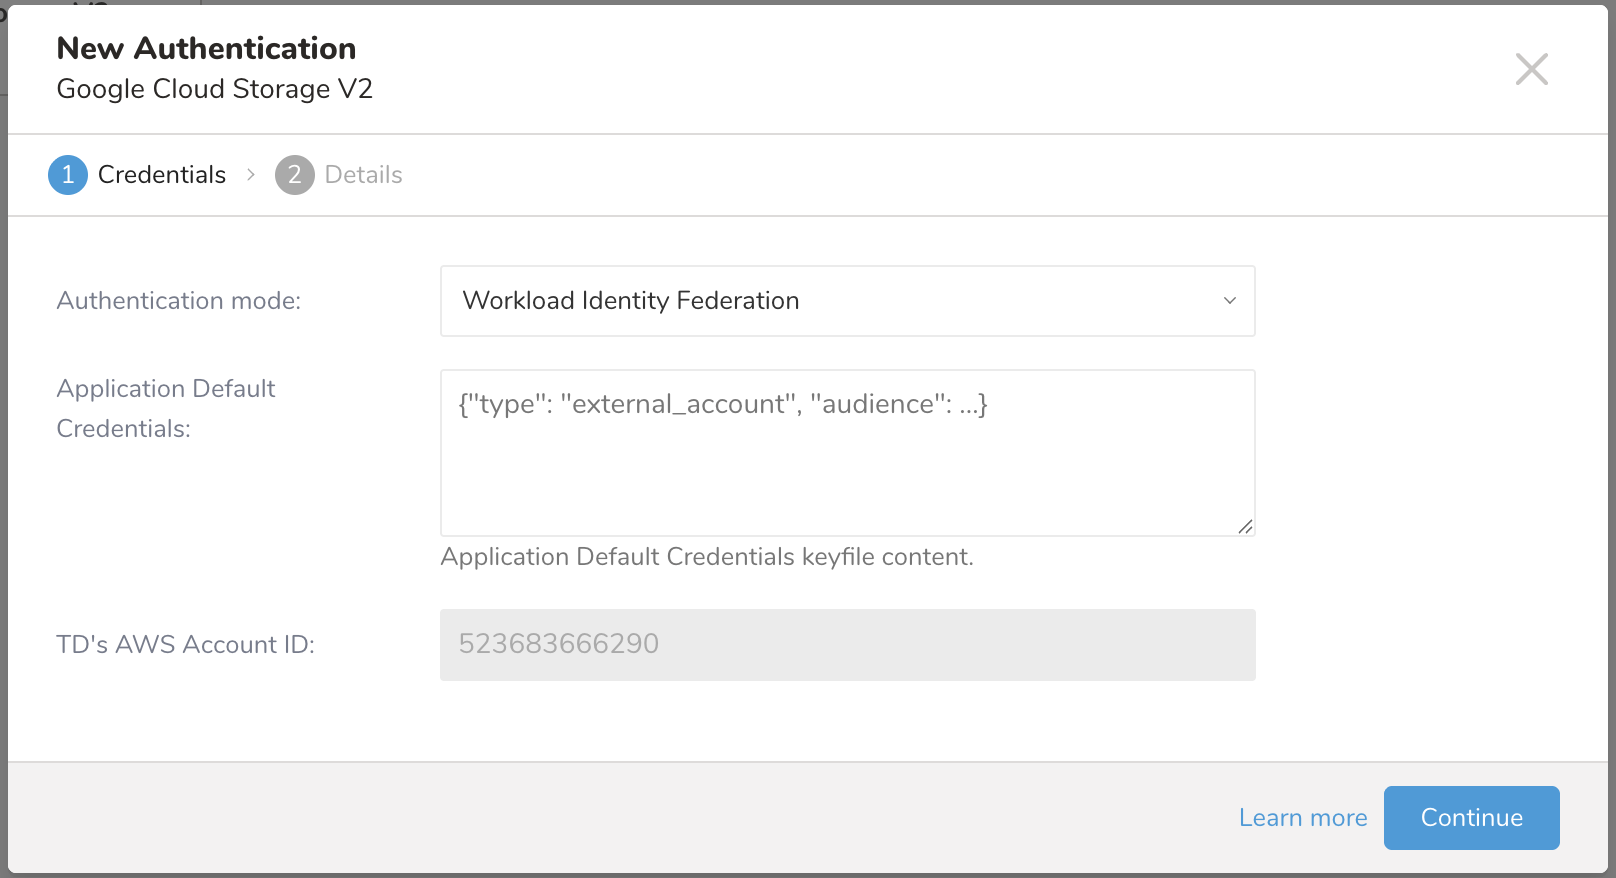
Type a name for your connection.
Select Continue.
Complete the instructions in Creating a Destination Integration.
Navigate to Data Workbench > Queries.
Select a query for which you would like to export data.
Run the query to validate the result set.
Select Export Results.
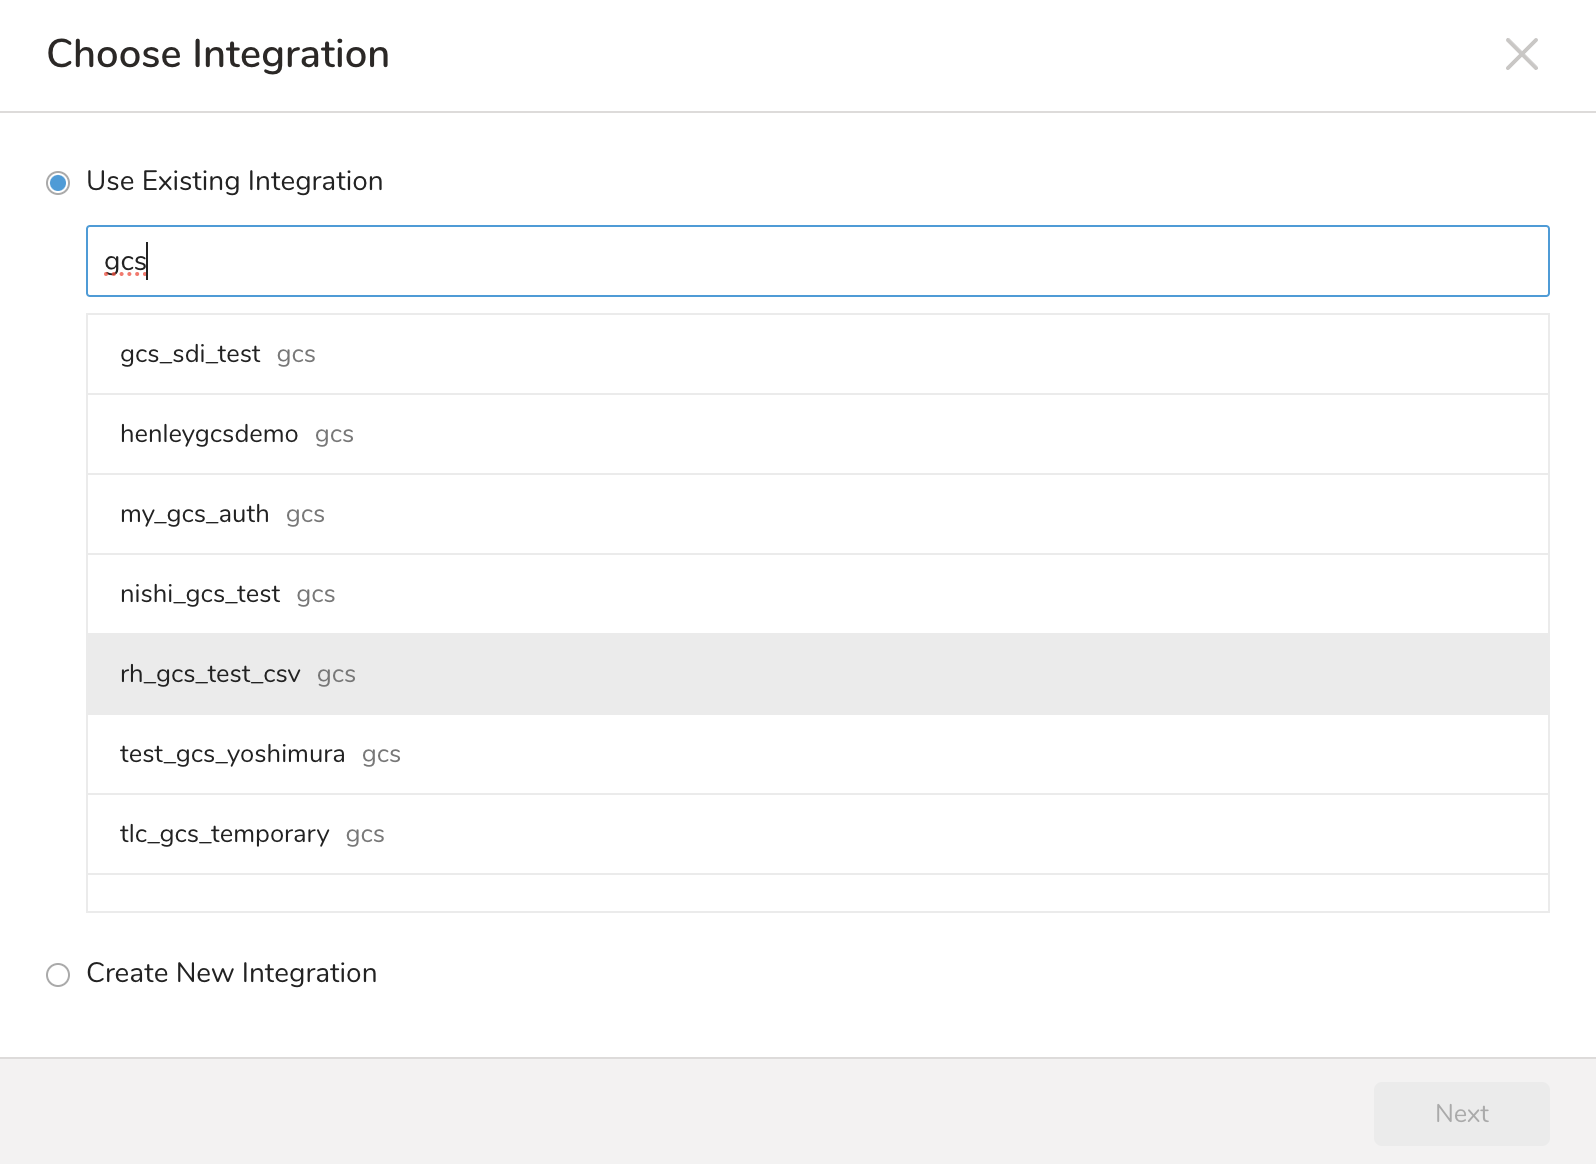
Select an existing integration authentication.
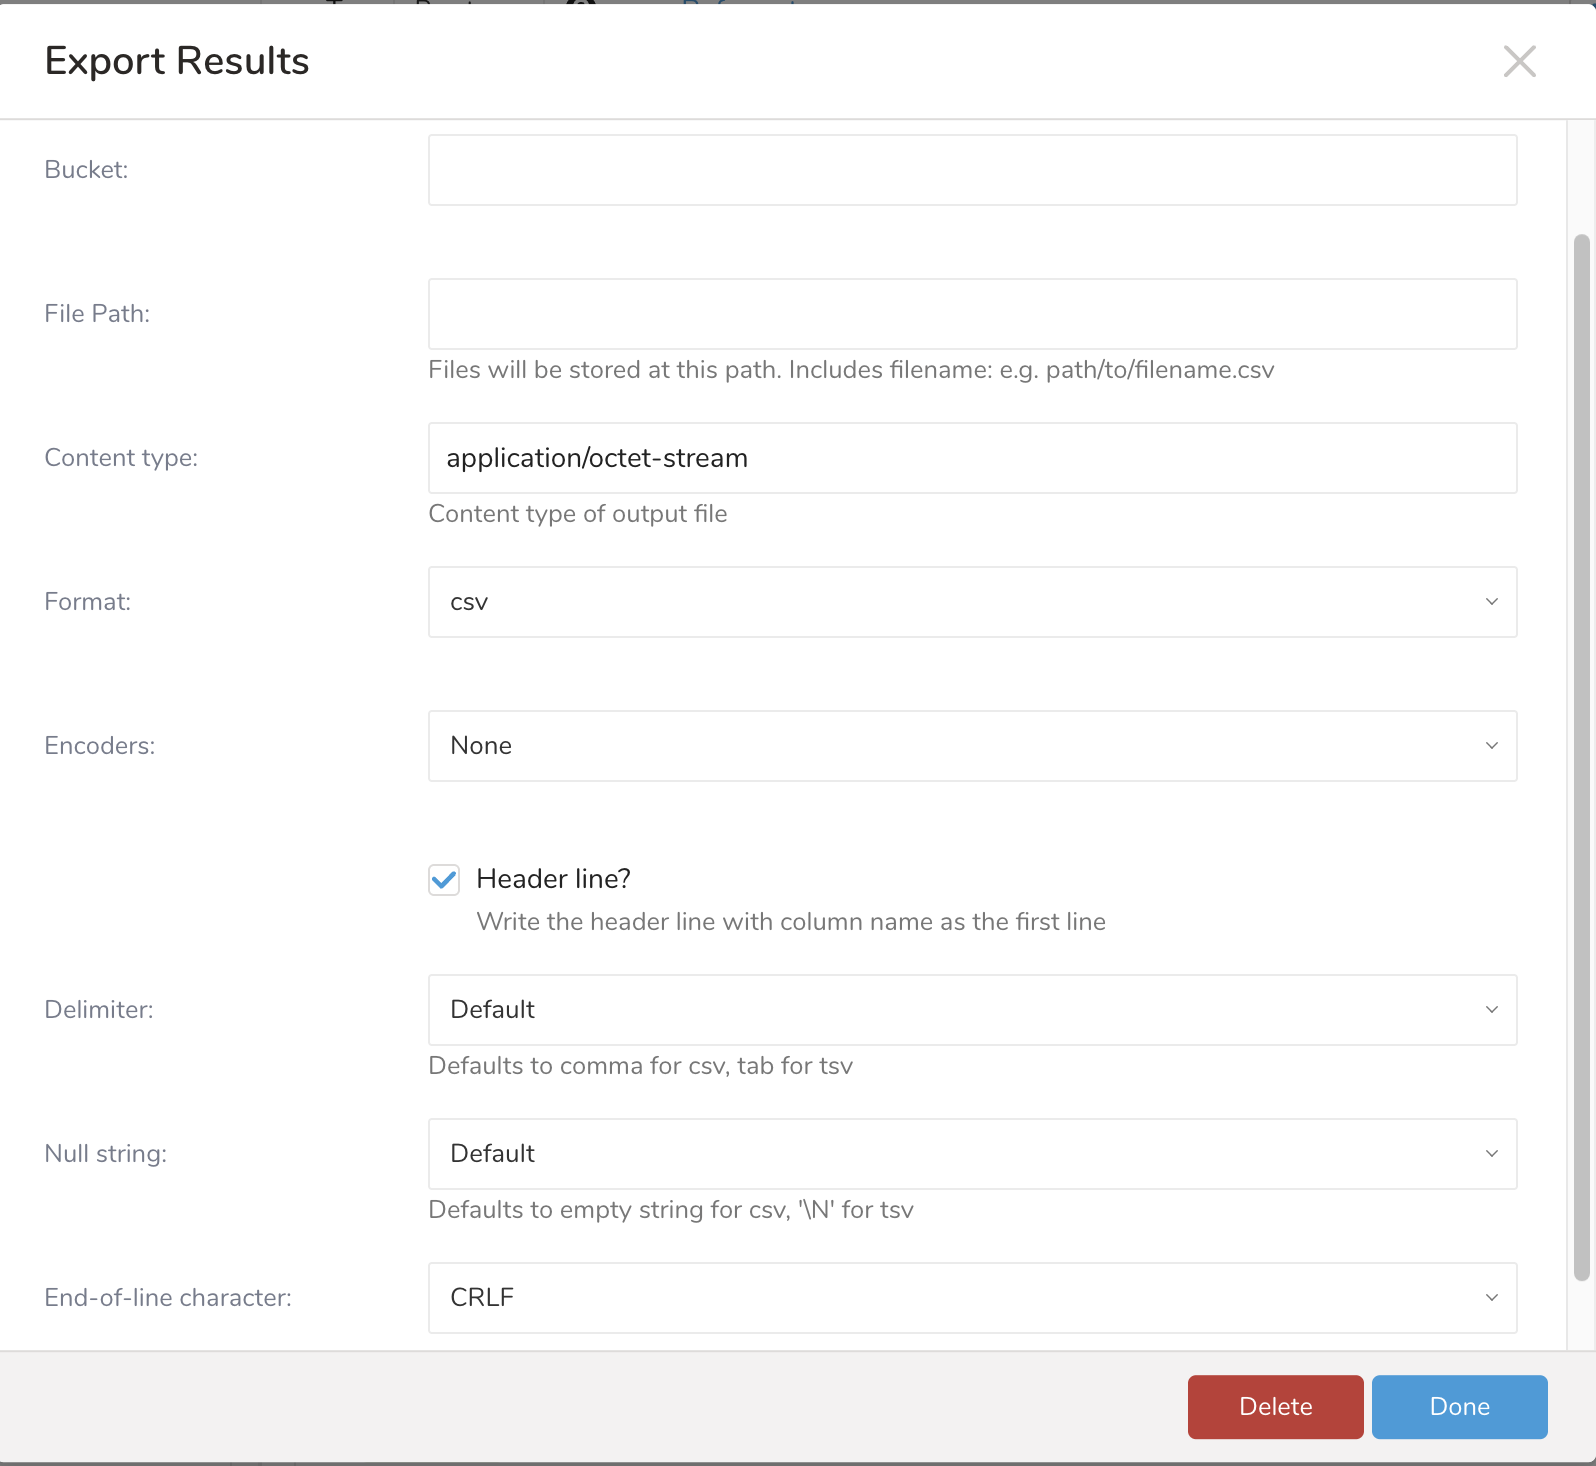
Define any additional Export Results details. In your export integration content, review the integration parameters. For example, your Export Results screen might be different, or you might not have additional details to fill out.
Select Done.
Run your query.
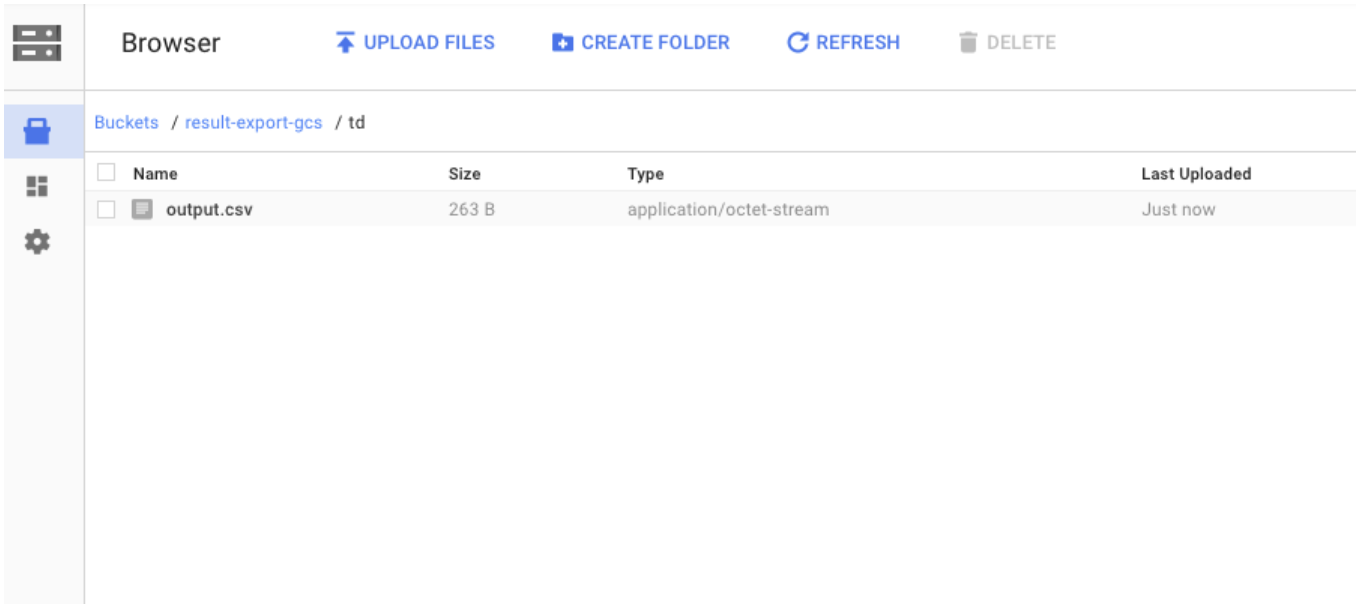
Validate that your data moved to the destination you specified.
| Parameter | Mandatory | Description |
|---|---|---|
| Bucket | yes | Google Cloud Storage bucket name |
| File Path | yes | Object path, including the filename. Example: path/to/filename.csv. |
| Content type | no | MIME type of the output file. Default value: application/octet-stream |
| Format | no | Output file format. Default value: csv |
| Encoders | no | Compression applied to the exported file. Default value: none |
| Public Key | yes if Encoders is PGP Encryption | The public key to use for encryption. |
| Key Identifier | no, only apply if Encoders is PGP Encryption | The Key ID or Fingerprint (as a hexadecimal string) of the public key used for encryption |
| Armor | no, only apply if Encoders is PGP Encryption | Whether to use ASCII armor or not (as a hexadecimal string) of the public key used for encryption |
| Compression Type | no, only apply if Encoders is PGP Encryption | Specifies the compression algorithm to be used for compressing the file. Default value: none |
| Header line? | no | Write the header line with column names as the first line. Default value: true |
| Delimiter | no | Character used to separate columns. Default value: Default |
| Null string | no | Substitution string for NULL values. Default value: Default |
| End-of-line character | no | Line termination character. Default value: CRLF |
SELECT
  col_1
FROM
  tbl
WHERE col_1 != 'email'Upon successful completion of the query, the results are automatically imported to the specified Google Cloud Storage destination:
You can also send segment data to the target platform by creating an activation in the Audience Studio.
- Navigate to Audience Studio.
- Select a parent segment.
- Open the target segment, right-mouse click, and then select Create Activation.
- In the Details panel, enter an Activation name and configure the activation according to the previous section on Configuration Parameters.
- Customize the activation output in the Output Mapping panel.
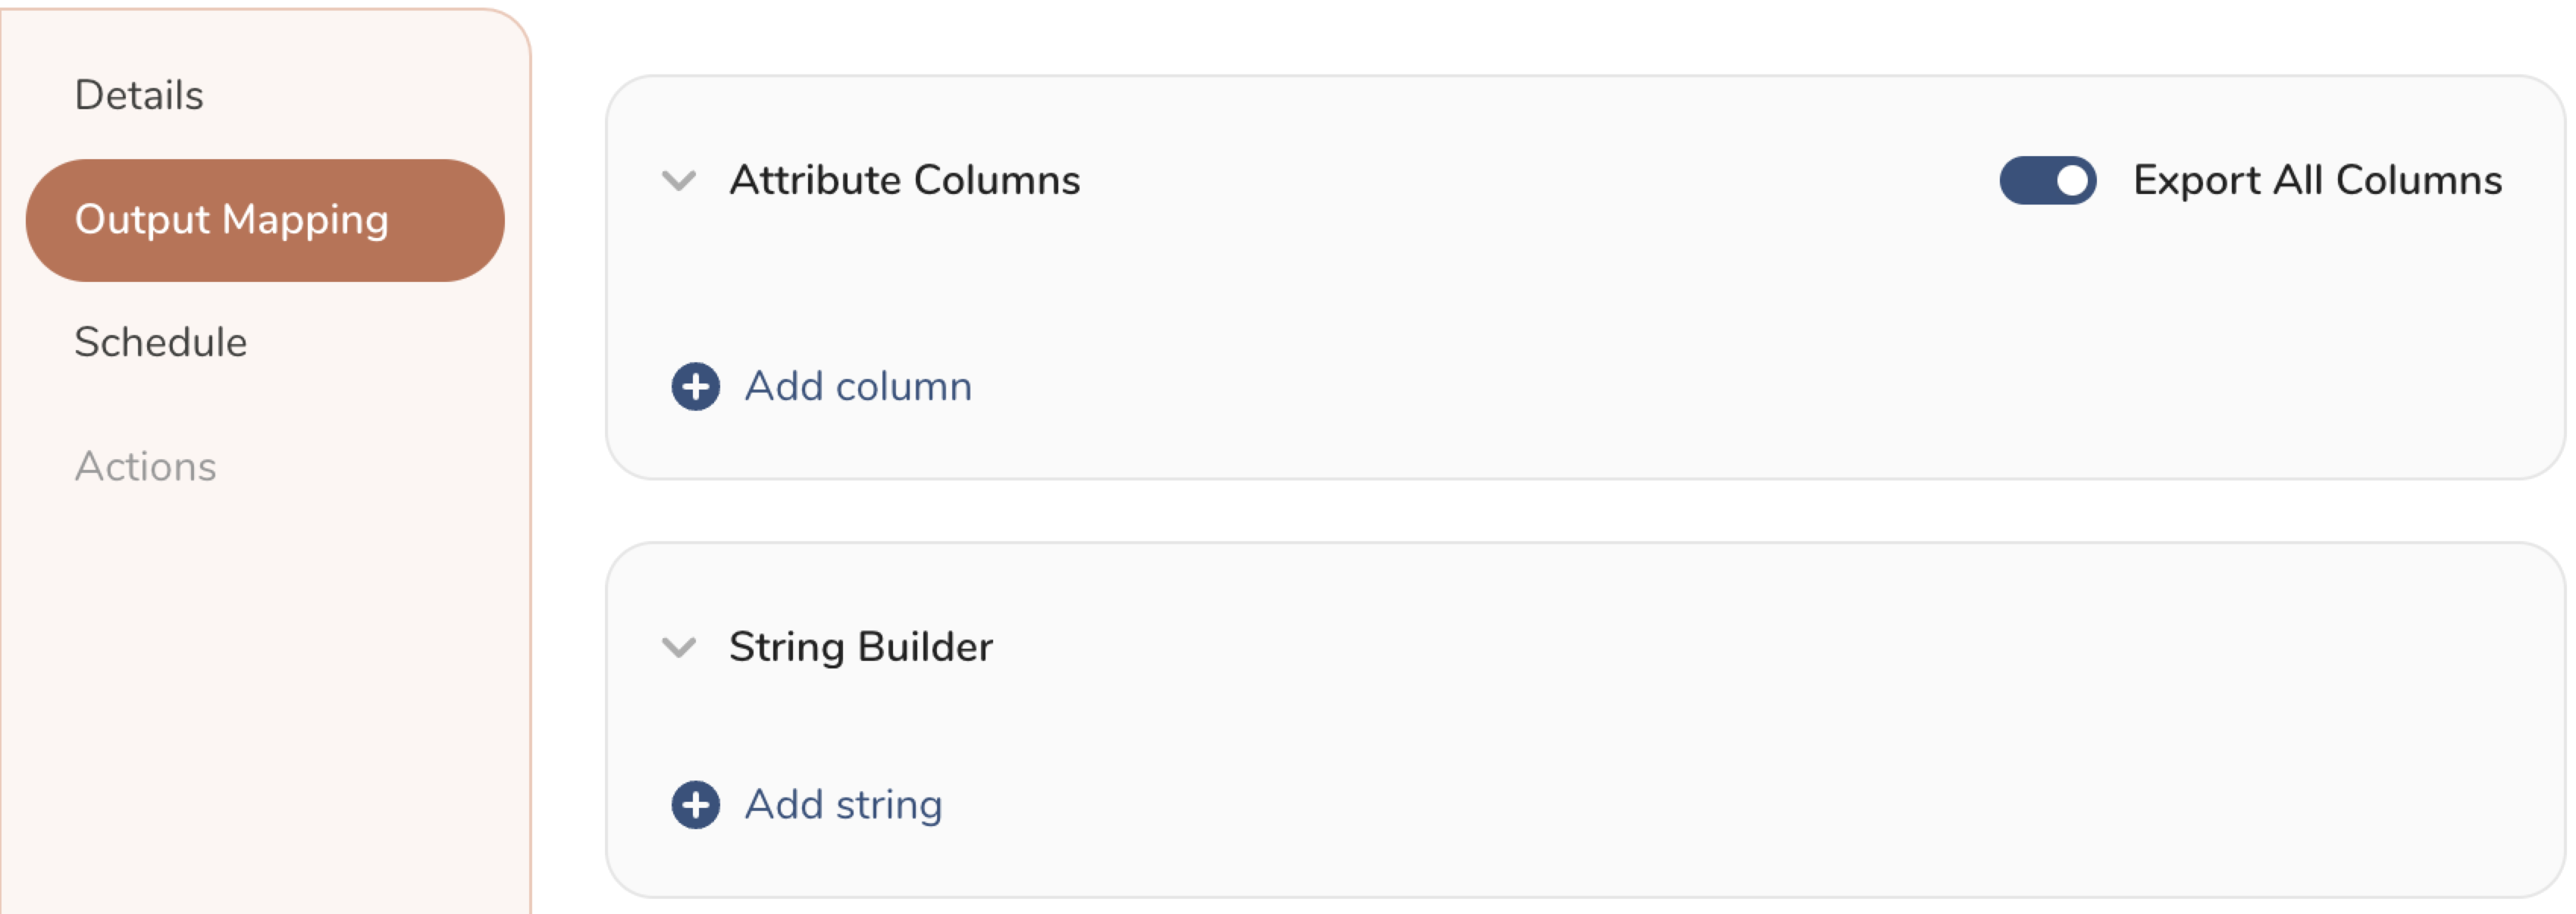
- Attribute Columns
- Select Export All Columns to export all columns without making any changes.
- Select + Add Columns to add specific columns for the export. The Output Column Name pre-populates with the same Source column name. You can update the Output Column Name. Continue to select + Add Columnsto add new columns for your activation output.
- String Builder
- + Add string to create strings for export. Select from the following values:
- String: Choose any value; use text to create a custom value.
- Timestamp: The date and time of the export.
- Segment Id: The segment ID number.
- Segment Name: The segment name.
- Audience Id: The parent segment number.
- + Add string to create strings for export. Select from the following values:
- Set a Schedule.
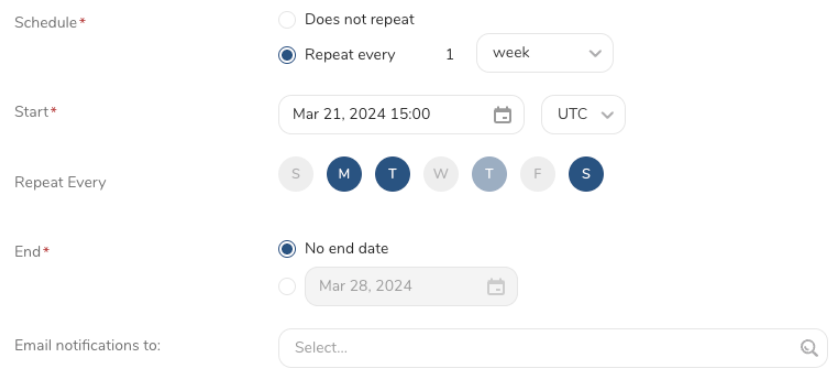
- Select the values to define your schedule and optionally include email notifications.
- Select Create.
If you need to create an activation for a batch journey, review Creating a Batch Journey Activation.
The following command allows you to set a scheduled query that sends query results to Google Cloud Storage.
With authentication mode JSONKey
- Specify your JSON key in the following sample syntax.
- Use backslash to break a line without breaking the code syntax.
'{"type":"gcs_v2","bucket":"samplebucket","file_path":"output/test.csv","format":"csv","compression":"none","header_line":false,"delimiter":",","null_string":"","newline":"CRLF","auth_method":"json_key","json_keyfile":"{\"private_key_id\": \"ABCDEFGHIJ\", \"private_key\": \"-----BEGIN PRIVATE KEY-----\\nABCDEFGHIJ\\ABCDEFGHIJ\\n-----END PRIVATE KEY-----\\n\", \"client_email\": \"ABCDEFGHIJ@developer.gserviceaccount.com\", \"client_id\": \"ABCDEFGHIJ.apps.googleusercontent.com\", \"type\": \"service_account\"}"}'With authentication mode Workload Identity Federation
- Specify your ADC key in the following sample syntax.
- Use backslash to break a line without breaking the code syntax.
'{"type":"gcs_v2","bucket":"samplebucket","file_path":"output/test.csv","format":"csv","compression":"none","header_line":false,"delimiter":",","null_string":"","newline":"CRLF","auth_method":"wif","adc_keyfile":"{\"universe_domain\": \"googleapis.com\"......}"}'For example,
$ td sched:create scheduled_gcs_v2 "10 6 * * *" \
-d dataconnector_db "SELECT id,account,purchase,comment,time FROM data_connectors" \
-r '{"type":"gcs_v2","bucket":"samplebucket","file_path":"output/test.csv","format":"csv","compression":"none","header_line":false,"delimiter":",","null_string":"","newline":"CRLF","auth_method":"json_key","json_keyfile":"{\"private_key_id\": \"ABCDEFGHIJ\", \"private_key\": \"-----BEGIN PRIVATE KEY-----\\nABCDEFGHIJ\\ABCDEFGHIJ\\n-----END PRIVATE KEY-----\\n\", \"client_email\": \"ABCDEFGHIJ@developer.gserviceaccount.com\", \"client_id\": \"ABCDEFGHIJ.apps.googleusercontent.com\", \"type\": \"service_account\"}"}'
Parameters
| Parameter | Data Type | Mandatory | Default Value | Description |
|---|---|---|---|---|
| bucket | string | yes | N/A | Google Cloud Storage bucket name |
| file_path | string | yes | N/A | Object path , including the filename. Example: path/to/filename.csv. |
| content_type | string | no | application/octet-stream | MIME type of the output file. |
| format | string | no | csv | Output file format. Supported values: csv/tsv |
| compression | string | no | none | Compression applied to the exported file. Supported values: 'none', 'gz', 'bzip2', 'encrypt_pgp' |
| public_key | string | yes if compression is encrypt_pgp | N/A | The public key to use for encryption. |
| key_identifier | string | no, only apply if compression is encrypt_pgp | N/A | The Key ID or Fingerprint (as a hexadecimal string) of the public key used for encryption |
| armor | string | no, only apply if compression is encrypt_pgp | N/A | Whether to use ASCII armor or not (as a hexadecimal string) of the public key used for encryption |
| compression_type | string | no, only apply if compression is encrypt_pgp | N/A | Specifies the compression algorithm to be used for compressing the file. Supported values: 'none', 'gzip', 'bzip2', 'bzip2_built_in', 'zip_built_in', 'zlib_built_in' |
| header_line | boolean | no | true | Write the header line with column names as the first line. Supported values: true/false |
| delimiter | string | no | default | Character used to separate columns. Supported values: 'default', ',', '\t', '|' |
| null_string | string | no | default | Substitution string for NULL values (string, optional). Supported values: 'default', '', '\N', 'NULL', 'null' |
| newline | string | no | CRLF | Line termination character (string, optional). Supported values: 'CRLF', 'LF', 'CR' |
- The Result Export can be scheduled to upload data to a target destination periodically.
- All import and export integrations can be added to a Treasure Workflow. The td workflow operator can be used to export a query result to a specified connector. For more information, see Workflow Operators.
The Embulk-encoder-Encryption document
Note: Please ensure that you compress your file before encrypting and uploading.
When you decrypt using non-built-in encryption, the file will return to a compressed format such as .gz or .bz2.
When you decrypt using built-in encryption, the file will return to raw data.