This page shows you how to upload a CSV file as a contact list, write the email, set the send time, and launch a List campaign in Engage Studio. Use this procedure when you want to email a list of people that you already have as a file, without creating a Parent Segment. For what a List campaign is and how its statuses work, see List Campaigns in Engage Studio.
Before you start, confirm that you have the following.
- Edit permission to create and edit campaigns, and Launch permission to launch them. See Workspaces and Permissions.
- Import permission on at least one database. The Database list shows only the databases you can import into.
- A sender profile in your workspace.
- At least one email template in your workspace.
- An Engage authentication. If none appears on the Activation tab, ask your administrator to create one.
- A CSV file that has a header row and an
emailcolumn. - The workspace owner has an API key set and can access the database that you choose. Ask the workspace owner to confirm this before you launch.
The CSV file becomes the recipient list, so prepare it before you upload it.
- Put the column names in the first row.
- Name the column that contains email addresses
emailorEmail. Do not include spaces in the column name. This page usesemailin its examples. - Remove contacts who have unsubscribed, or whose consent to receive marketing email you cannot confirm.
- Save the file with the
.csvextension.
The file might look like this.
email,first_name
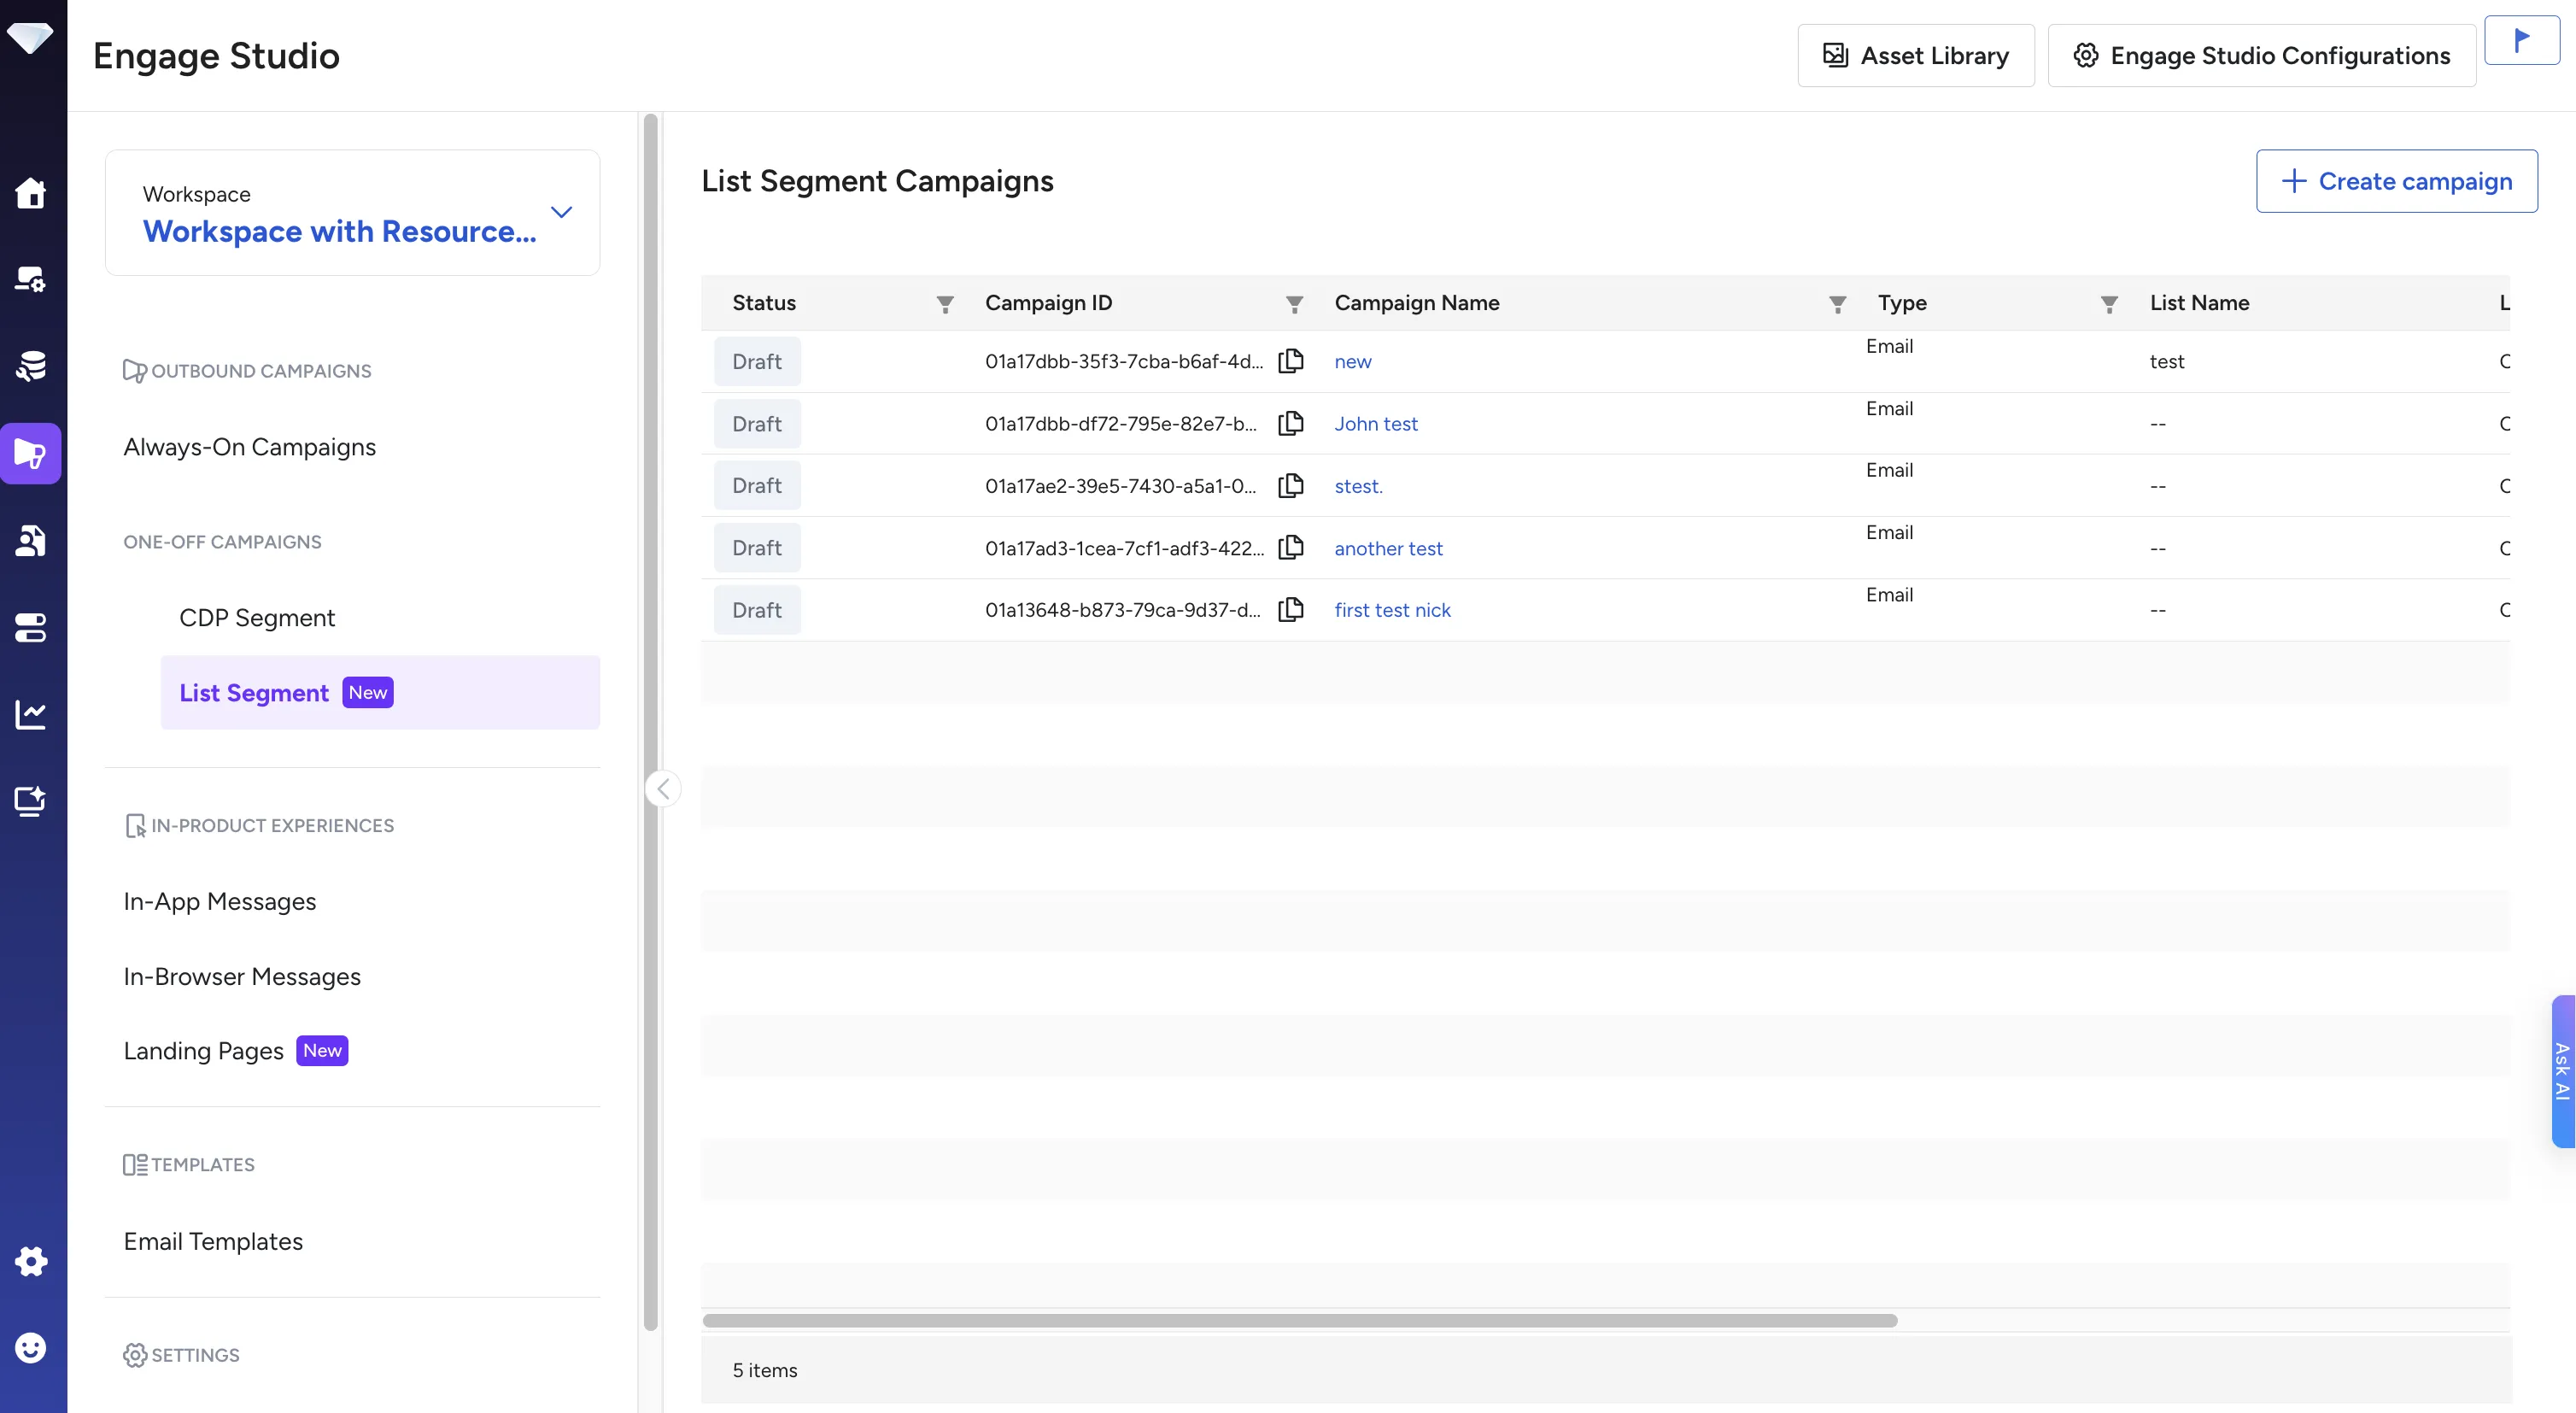
recipient@example.com,Alex- Select your workspace, and then select ONE-OFF CAMPAIGNS > List Segment. Expected result: The List Segment Campaigns page opens and shows the campaigns in the workspace.
- Select Create campaign.
- Enter a campaign name, and then select Create. Expected result: The Campaign Details page opens on the Target Audience tab, and the status is Draft.
On the Target Audience tab, choose a contact list that already exists, or upload a new CSV file.
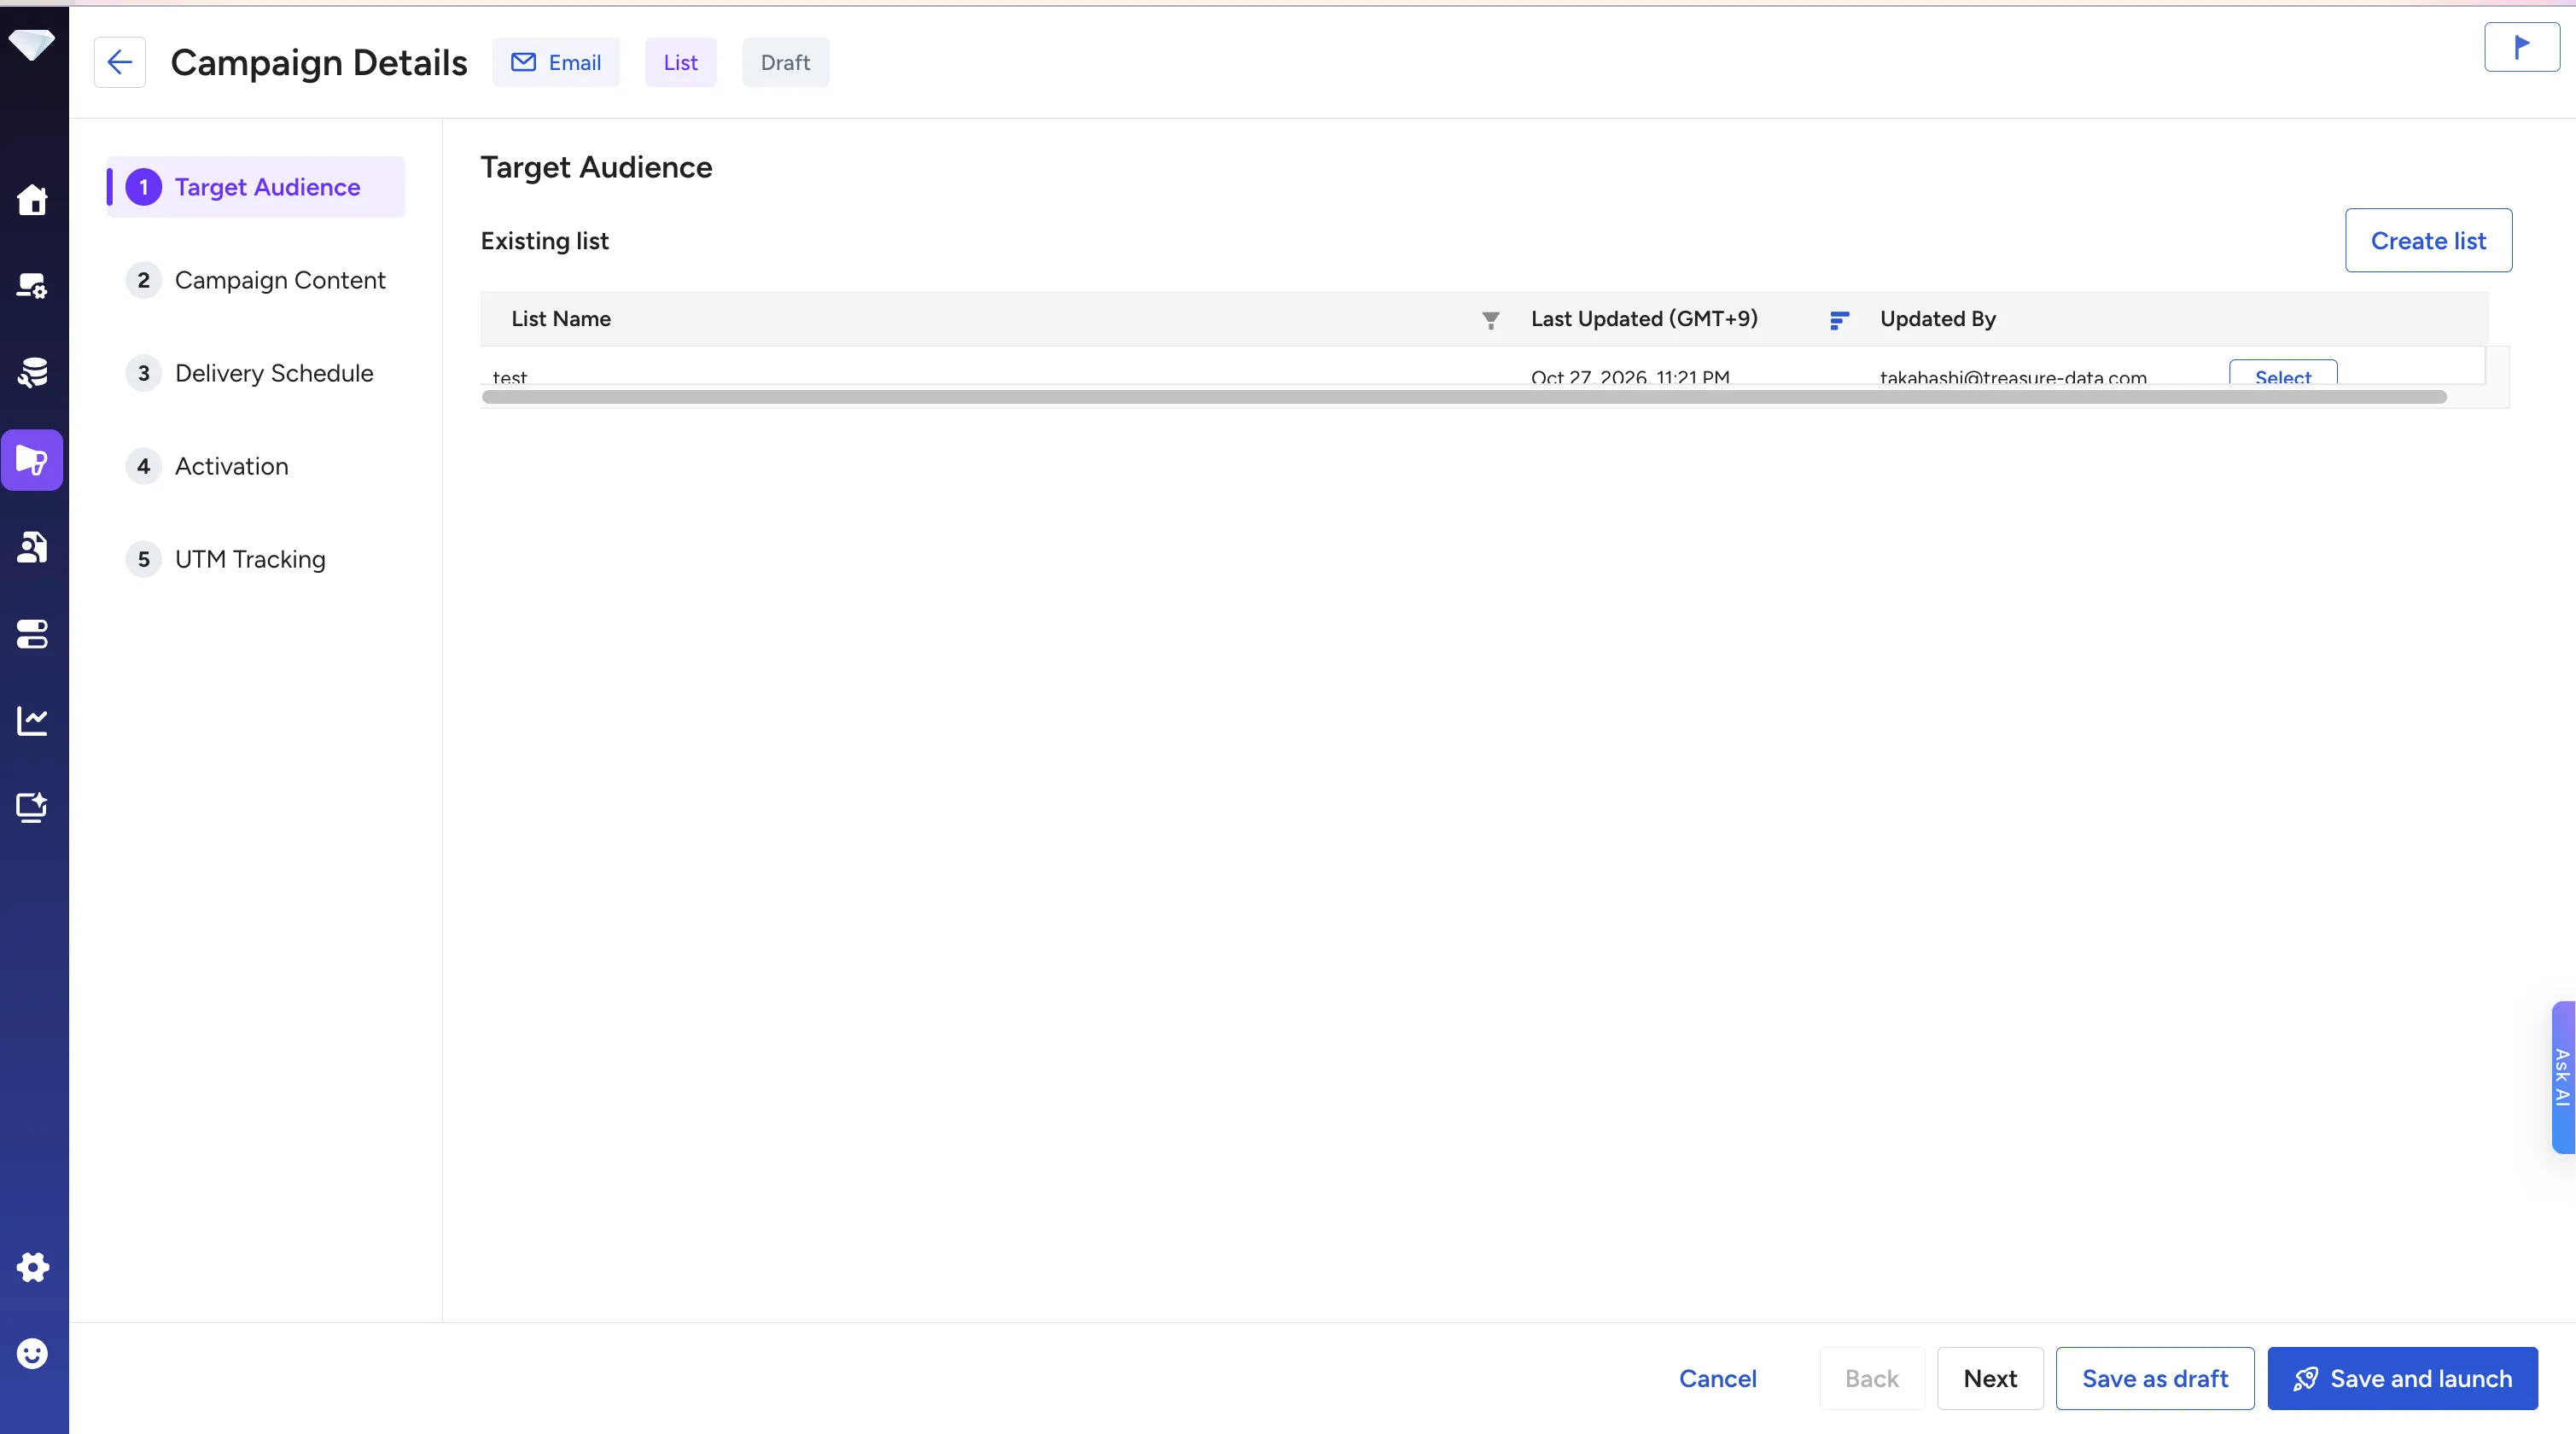
- Find the list in the Existing list table.
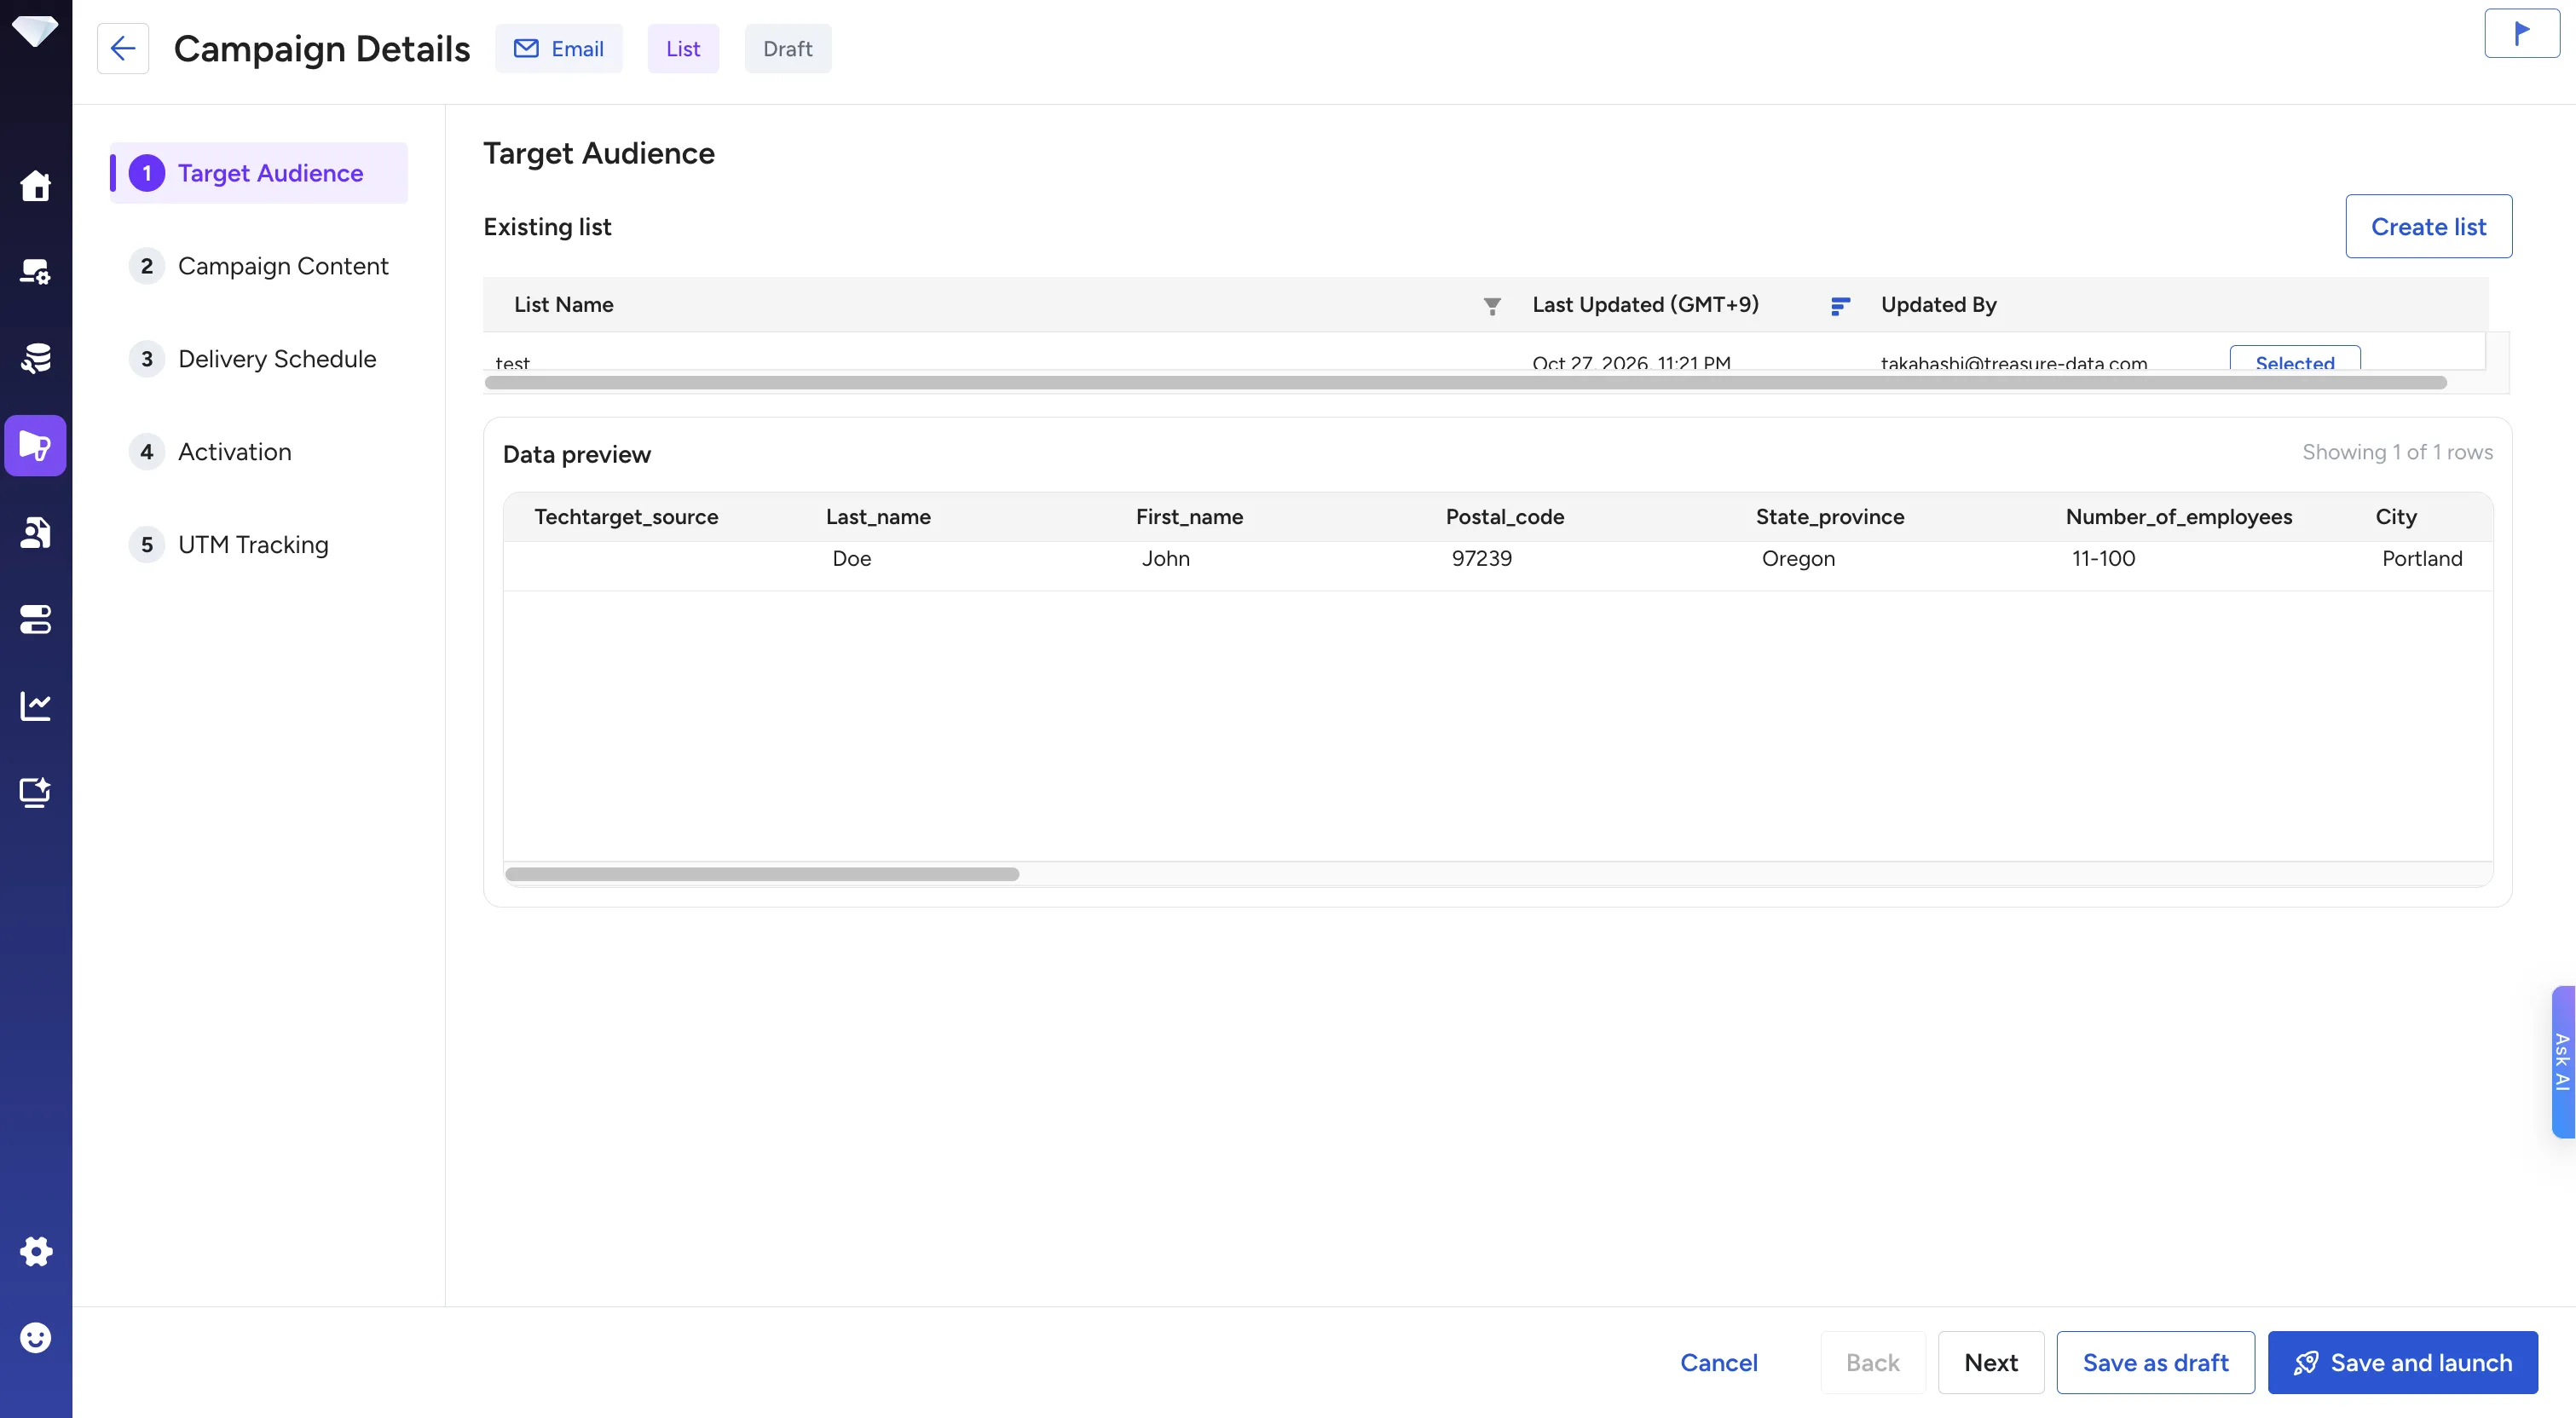
- Select Select in the row for the list. Expected result: The button changes to Selected, and the Data preview shows rows from the table.
The data preview shows some of the rows in the table, with a label such as Showing 1 of 1 rows that gives the number shown and the total. It might not match the data that is sent.
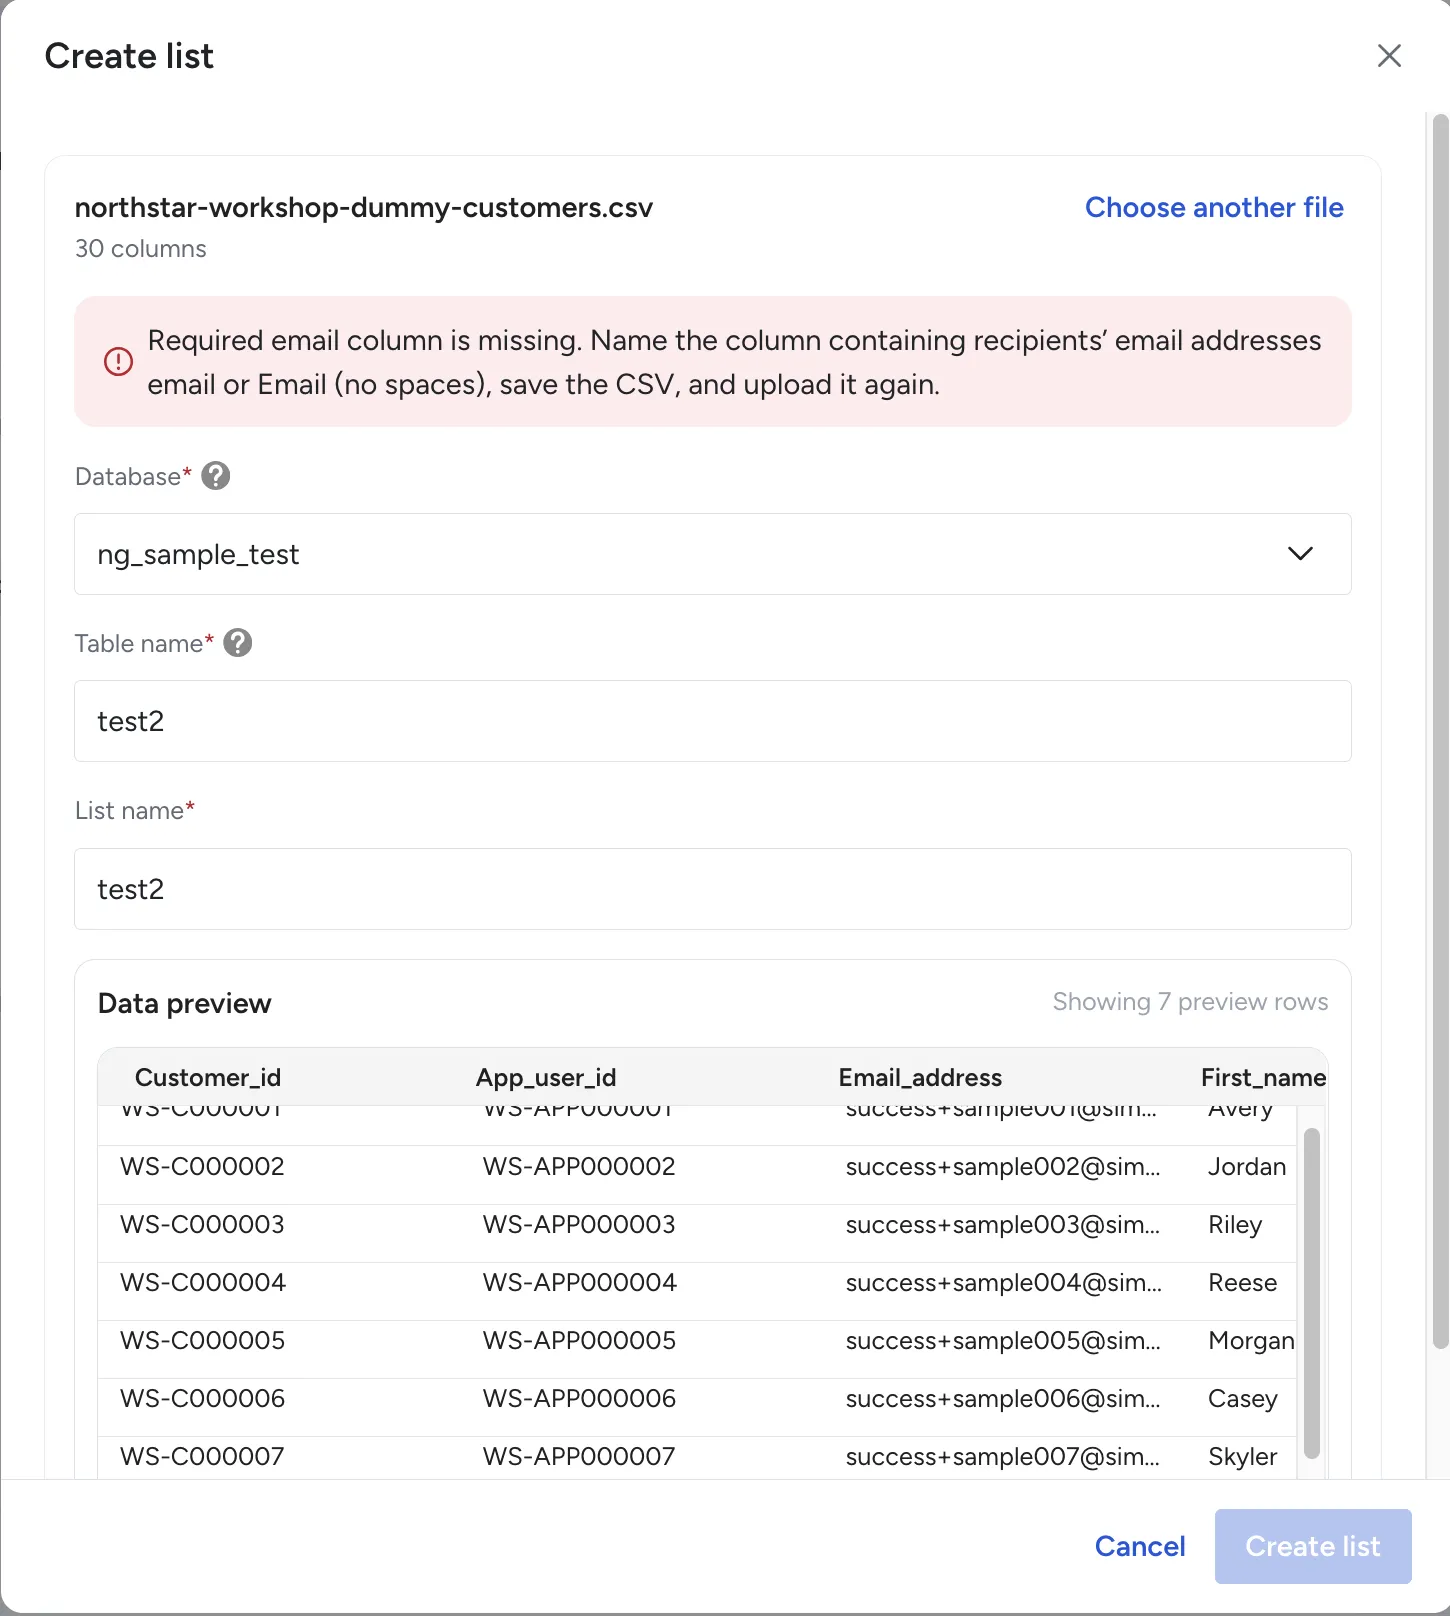
- Select Create list.
- Select a CSV file, or drag and drop it into the drop zone. Expected result: The upload starts automatically. The file name and column count appear, and the Data preview shows rows from the file.
- If you see Required email column is missing, rename the email column to
email, save the file, select Choose another file, and then select the corrected file. Expected result: The error message disappears. - Select Database, and then select the database that stores the table. Enter a Table name and a List name.
- Select Create list. Expected result: Engage Studio imports the rows into the table. Keep the page open until the import finishes. When it finishes, the list is selected for the campaign.
If the table name already exists, Engage Studio asks you to enter a different table name or to overwrite the existing table.
If the file has no email column, the Create list dialog shows an error. The error says to name the column that contains email addresses email or Email with no spaces, save the file, and upload it again.
Overwriting a table replaces all of its rows, and the contact list keeps its existing name. If a Planned campaign uses that table, its recipients change.
On the Campaign Content tab, write the email that the list receives.
- Select Select email template, and then select a template. Expected result: The template content is copied into the campaign. Later changes to the original template do not change this campaign.
- Select a Sender profile. Expected result: The sender list shows the senders in your workspace. It becomes available after you select a template.
- (Optional) Add merge tags to personalize the email. For each tag, select a column from the contact list in Attribute Name, and then enter a Display Name and a Preview Value. Expected result: The merge tag can be inserted into the template. You can add up to 20 merge tags.
- Select Send test emails, enter one or more addresses separated by commas or new lines, and then select Send. Expected result: The message Emails successfully sent appears, and the test email arrives at each address. A test email uses the content you have entered, including changes that you have not saved.
On the Delivery Schedule tab, choose when the campaign sends.
- To send right after launch, keep As soon as the campaign is launched selected.
- To schedule the send, select At a designated time, and then set the Send date, Send time, and Timezone. Expected result: The campaign waits in Planned until the scheduled time. The calendar does not allow past dates.
- (Optional) Under Email notifications to, select the users who should receive the result. For each user, select Success, Failure, or both. Expected result: Each selected user receives a notification email when the send succeeds or fails. The notification is addressed to
noreply@treasure.ai, and the selected users receive it as blind copy (BCC) recipients.
The Activation tab sets the Engage authentication that sends this campaign. While the options load, the Authentication field shows Loading....
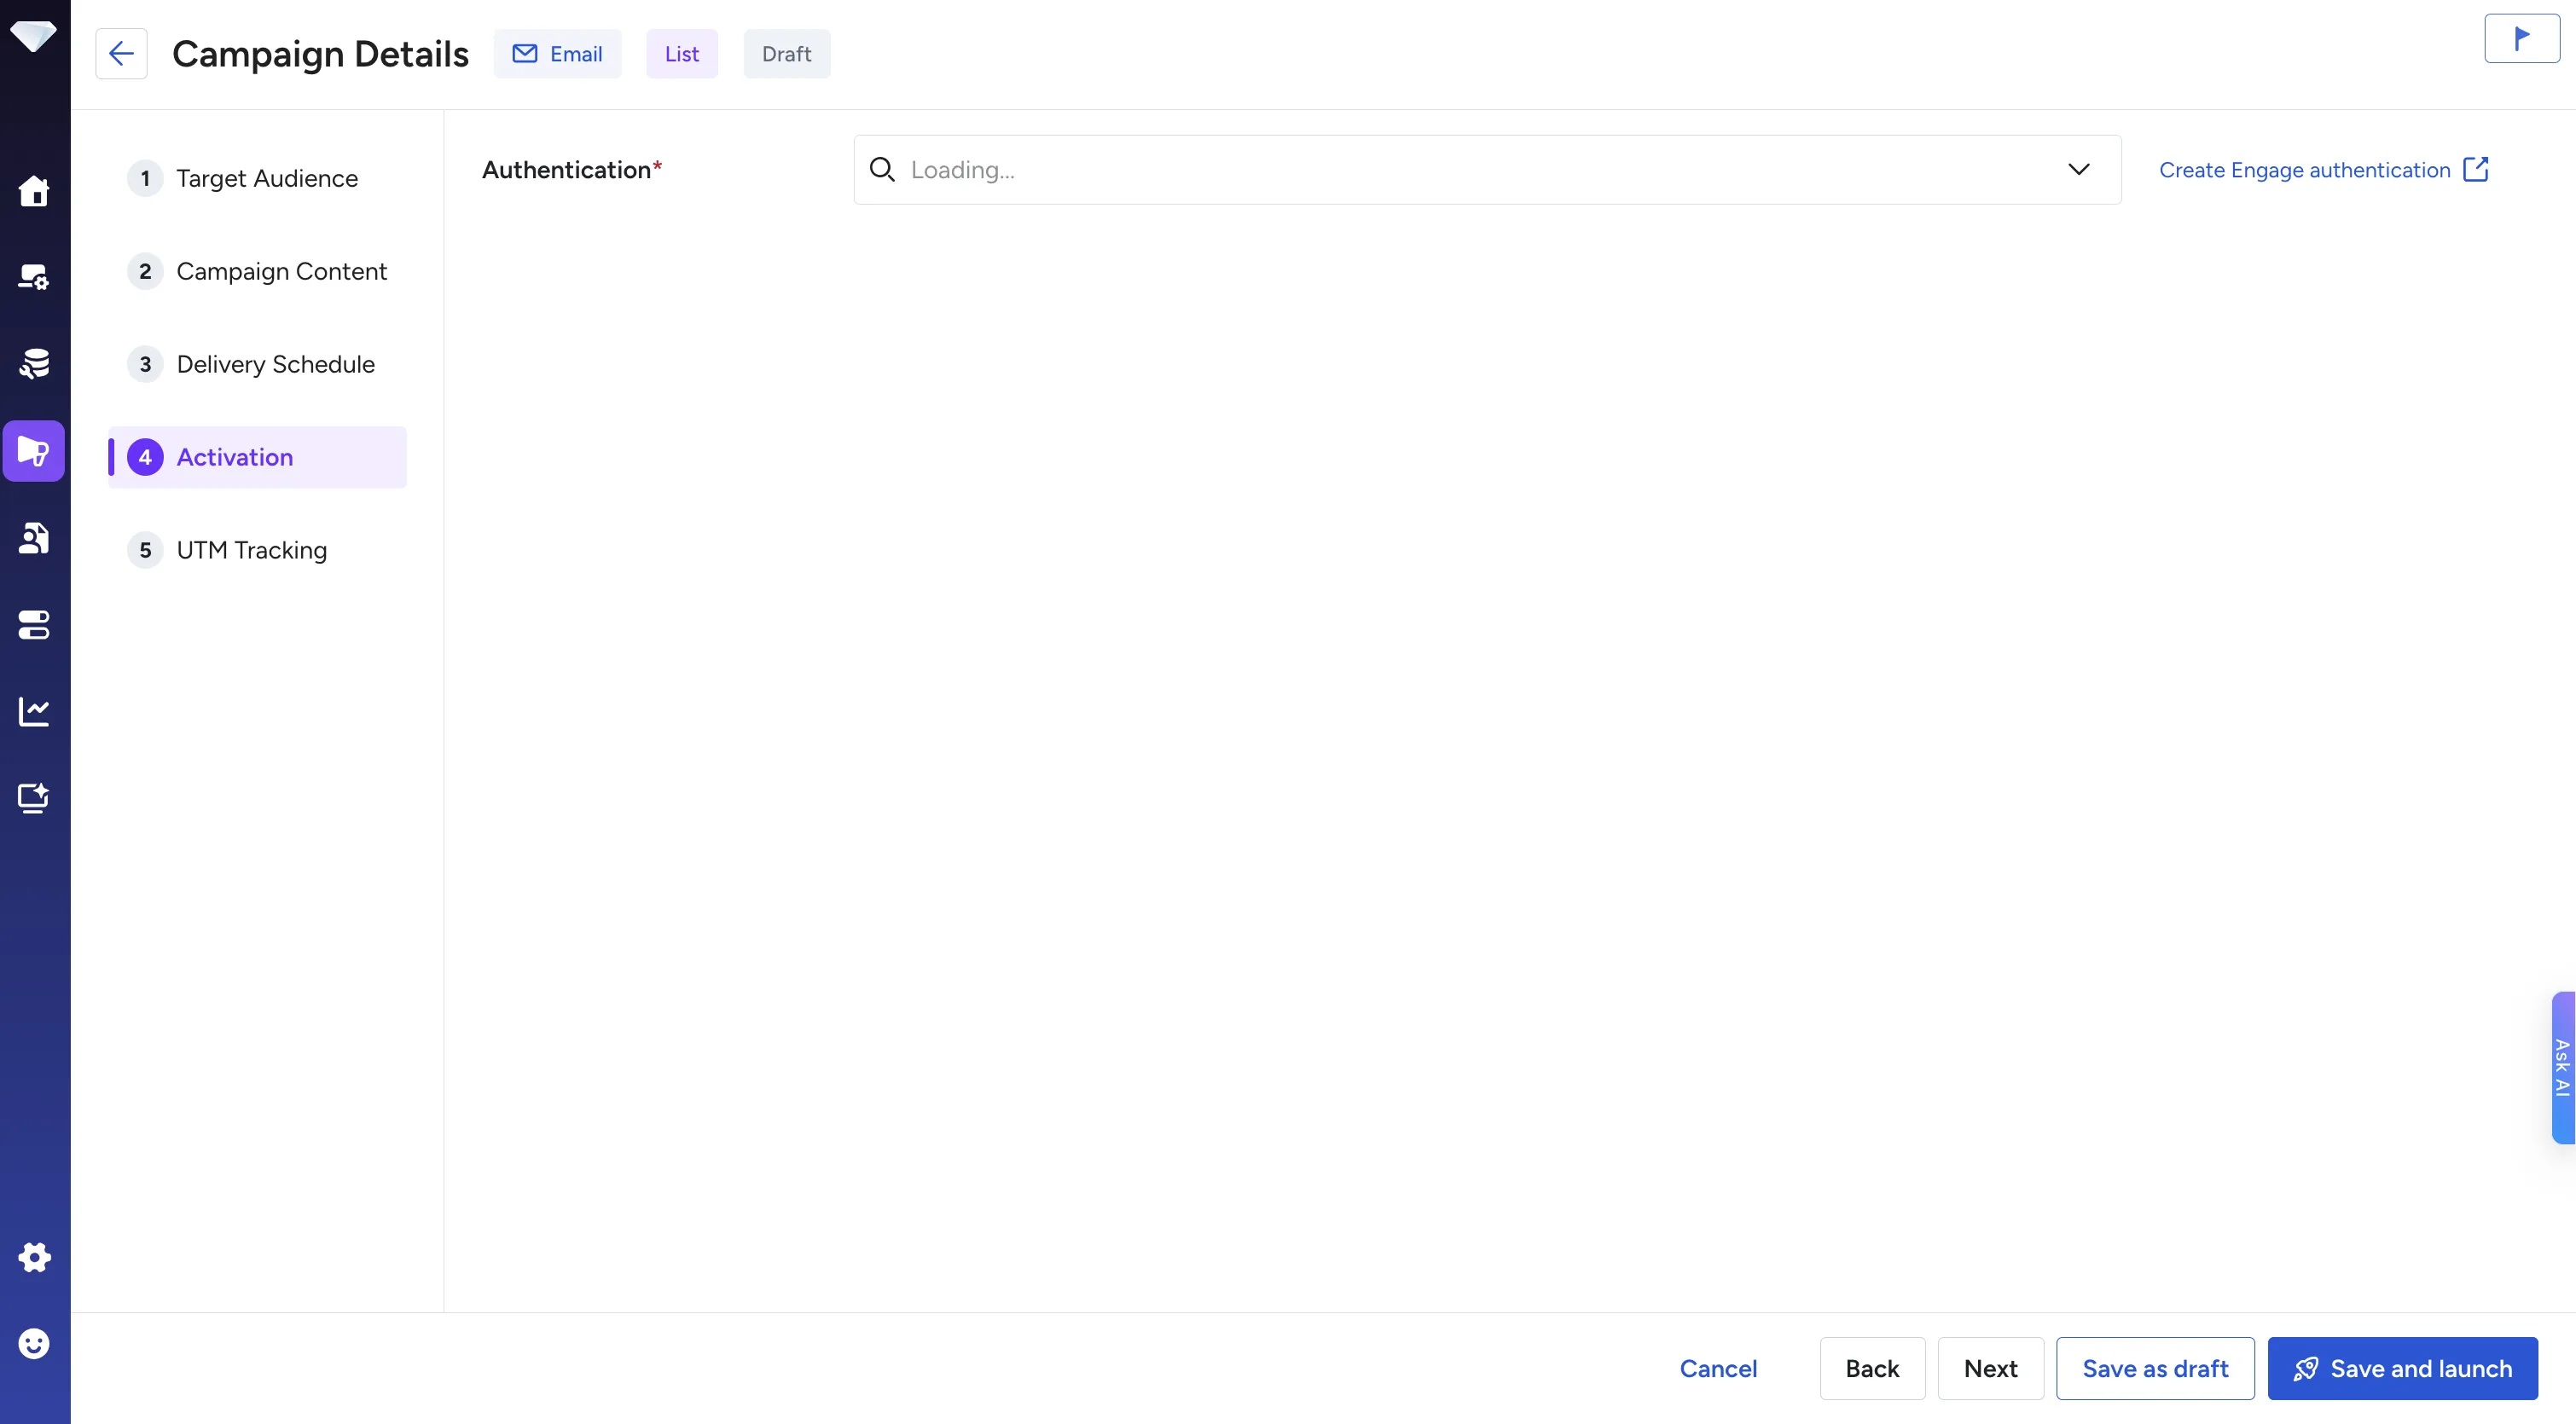
- Select Activation.
- Select the Authentication that your administrator prepared. Expected result: Only Engage authentications appear in the list. The Authentication field is required.
- If the list is empty, select Create Engage authentication. The integrations catalog opens in a new tab. If you do not have permission to create an authentication, ask your administrator.
- Check the Target Audience, Campaign Content, Delivery Schedule, and Activation tabs.
- To keep the campaign in Draft without launching it, select Save as draft.
- To launch the campaign, select Save and launch, and then confirm the launch in the Launch Campaign dialog. Expected result: Engage Studio saves all tabs and launches the campaign. The status becomes Planned. An immediate send moves to Active, and then to Finished when sending completes.
After you launch a campaign, you cannot edit it. To change it, pause it (Planned) or revert it to draft (Suspended).
If the launch fails, Engage Studio shows the reason. The campaign stays in Draft. Fix the problem, and then launch the campaign again. See Troubleshoot Common Problems.
Use the actions menu on the List Segment Campaigns page, or the buttons on the campaign's page.
| Action | Available when | What it does |
|---|---|---|
| Pause | Planned | Cancels the scheduled send and returns the campaign to Draft. You can edit it. |
| Revert to draft | Suspended | Returns the campaign to Draft. Engage Studio does not resend the campaign automatically. Check which recipients already received the email before you launch it again. |
| Duplicate | Any status | Creates a new draft named <name> (Copy). The contact list, content, sender, merge tags, notifications, authentication, and UTM settings are copied. The schedule is cleared. |
| Delete | Draft | Deletes the campaign. The contact list remains. |
An Active campaign cannot be stopped. Wait until sending finishes.
| Message or symptom | Cause and fix |
|---|---|
| Required email column is missing | The CSV file has no column named email. Rename the column, save the file, and upload it again. |
| No source table is attached to the campaign | No contact list is selected. Select an existing list, or upload a CSV file, on the Target Audience tab. You can save the campaign without a list, but you cannot launch it. |
| must contain a column named 'email' | The selected contact list has no email column. Select a list that has one. |
| column 'email' must be of type string | The email column in the selected contact list is not stored as text. Select a different list, or upload a CSV file that has text email addresses. |
| These merge tags are not in the selected Contact List | A merge tag uses a column that the selected list does not have. Update the merge tags, or select a list that has those columns. |
| The selected Contact List is unavailable | The table was deleted, or you no longer have permission to view it. Select another list, or ask your administrator for access. |
| Campaign already exists with this name | Campaign names must be unique in the workspace. Enter a different name. |
| Select a future send time | The scheduled time has passed. Set a time in the future. |
| Email sender not found | The sender profile was deleted after you saved the draft. Select another sender profile. |
| requires an API key for the workflow execution user | The workspace owner has no API key set. Ask the workspace owner to set one. |
| The campaign status changes to Suspended | Processing failed. For example, a column that a merge tag uses was removed from the table, or access to the table changed. Check the cause, and check which recipients already received the email. Then revert the campaign to draft, and launch it again. |