# Google DFP DoubleClick for PublishersでProfiles APIを使用する
Treasure DataのProfiles APIトークンをGoogle DFP(DoubleClick for Publishers)と統合できます。この統合により、広告主はTreasure Dataで定義したセグメントに広告を掲載できます。
* [前提条件](/ja/products/customer-data-platform/audience-studio/profiles/use-the-profiles-api-with-google-dfp-doubleclick-for-publishers#prerequisites)
* [Profiles APIトークンの作成](/ja/products/customer-data-platform/audience-studio/profiles/use-the-profiles-api-with-google-dfp-doubleclick-for-publishers#create-the-profiles-api-token)
* [新しいトークンに名前を付ける](/ja/products/customer-data-platform/audience-studio/profiles/use-the-profiles-api-with-google-dfp-doubleclick-for-publishers#name-your-new-token)
* [トークンの設定](/ja/products/customer-data-platform/audience-studio/profiles/use-the-profiles-api-with-google-dfp-doubleclick-for-publishers#configure-the-token)
* [トークンへのセグメント追加](/ja/products/customer-data-platform/audience-studio/profiles/use-the-profiles-api-with-google-dfp-doubleclick-for-publishers#add-segments-to-the-token)
* [Profiles APIトークンとGoogle DFPの統合](/ja/products/customer-data-platform/audience-studio/profiles/use-the-profiles-api-with-google-dfp-doubleclick-for-publishers#integrating-the-profiles-api-token-with-google-dfp)
* [Profiles APIトークンで使用するGoogle DFPの設定](/ja/products/customer-data-platform/audience-studio/profiles/use-the-profiles-api-with-google-dfp-doubleclick-for-publishers#configure-google-dfp-for-use-with-the-profiles-api-token)
* [JavaScript DFPとTreasure Dataタグの作成](/ja/products/customer-data-platform/audience-studio/profiles/use-the-profiles-api-with-google-dfp-doubleclick-for-publishers#create-javascript-dfp-and-treasure-data-tags)
# 前提条件
* JavaScriptとHTMLの基本知識
* Treasure Dataの基本知識
* Treasure Data JavaScript SDKの基本知識
* Treasure Data Profiles APIトークンの基本知識
* Google DFP(DoubleClick for Publishers)の基本知識
# Profiles APIトークンの作成
## 新しいトークンに名前を付ける
1. Treasure コンソールを開きます。
2. Audience Studioに移動してセグメントを選択します。
3. フォルダーを選択します。
4. 新規作成を選択します。
5. Profiles APIトークンを選択します。
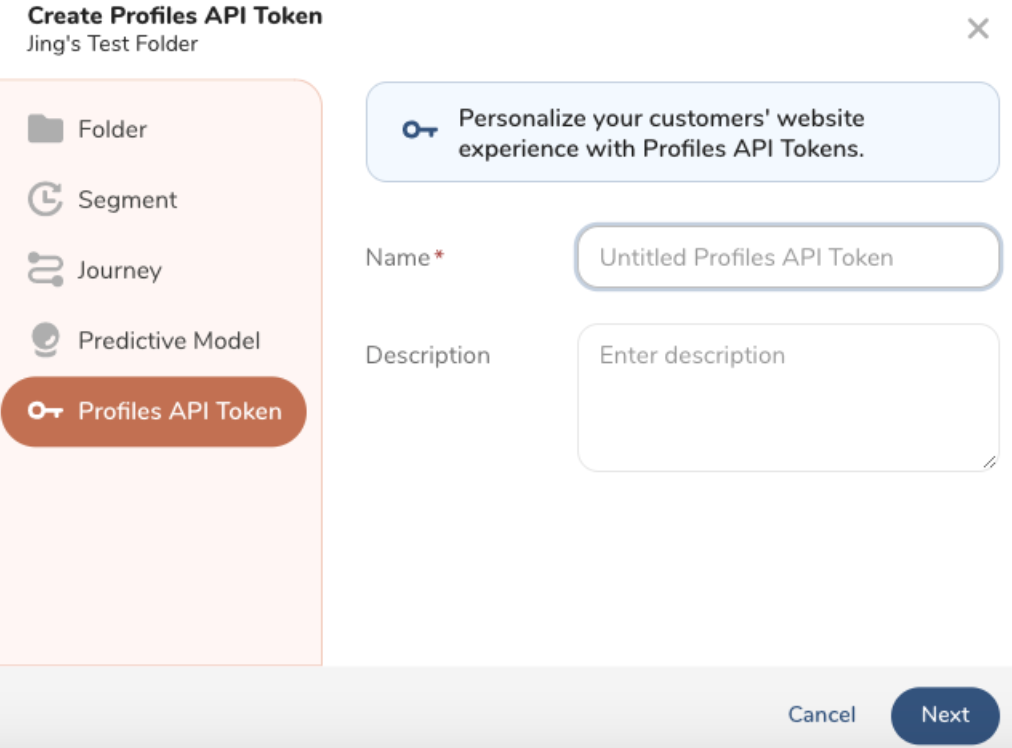
1. トークンの名前を入力し、オプションで説明を入力します。次へを選択します。
## トークンの設定
名前と説明は、トークンに名前を付けたときのものが引き継がれます。変更することもできます。
1. **ルックアップキー**を入力します。
ルックアップキーは、ペアレントセグメント内の一意の値を持つカラムです。このルックアップキーは正しいプロファイルを識別します。

**注:** ルックアップキーの更新は、トークンワークフローが完了すると有効になります。
`td_global_id`をルックアップキーとして使用する場合、Profiles APIはAPIリクエストのクエリパラメータではなく、ブラウザのCookieからルックアップ値を取得します。ブラウザ外でのテストまたは検証の目的(例: Postman)では、異なるカラムを使用してルックアップ値を手動で渡してください。
1. (オプション)最大5つの属性を入力します。
プロファイル属性は、クエリ時にプロファイルトークンから返すことができます
2. 以下のいずれかを選択します:
* 次へを選択して続行し、セグメントを追加します。
* 作成を選択してトークンを設定します。(後でセグメントを追加することもできます。)
## トークンへのセグメント追加
1. 以下のいずれかを選択します:
* トークンの設定後、**次へ**を選択します。
* Audience Studio > フォルダー > Profiles APIトークンに移動します。
1. Profiles APIトークンにセグメントを追加します。
2. **保存**を選択します。
# Profiles APIトークンとGoogle DFPの統合
Profiles APIトークンとGoogle DFPを統合するには、以下のセクションの手順を完了してください:
* [前提条件](/ja/products/customer-data-platform/audience-studio/profiles/use-the-profiles-api-with-google-dfp-doubleclick-for-publishers#h1_1644201065)
* [Profiles APIトークンの作成](/ja/products/customer-data-platform/audience-studio/profiles/use-the-profiles-api-with-google-dfp-doubleclick-for-publishers#h1__441927612)
* [新しいトークンに名前を付ける](/ja/products/customer-data-platform/audience-studio/profiles/use-the-profiles-api-with-google-dfp-doubleclick-for-publishers#UsetheProfilesAPIwithGoogleDFPDoubleClickforPublishers-NameYourNewToken)
* [トークンの設定](/ja/products/customer-data-platform/audience-studio/profiles/use-the-profiles-api-with-google-dfp-doubleclick-for-publishers#UsetheProfilesAPIwithGoogleDFPDoubleClickforPublishers-ConfiguretheToken)
* [トークンへのセグメント追加](/ja/products/customer-data-platform/audience-studio/profiles/use-the-profiles-api-with-google-dfp-doubleclick-for-publishers#UsetheProfilesAPIwithGoogleDFPDoubleClickforPublishers-AddSegmentstotheToken)
* [Profiles APIトークンとGoogle DFPの統合](/ja/products/customer-data-platform/audience-studio/profiles/use-the-profiles-api-with-google-dfp-doubleclick-for-publishers#h1__115221623)
* [Profiles APIトークンで使用するGoogle DFPの設定](/ja/products/customer-data-platform/audience-studio/profiles/use-the-profiles-api-with-google-dfp-doubleclick-for-publishers#h2__631907321)
* [JavaScript DFPとTreasure Dataタグの作成](/ja/products/customer-data-platform/audience-studio/profiles/use-the-profiles-api-with-google-dfp-doubleclick-for-publishers#h2_1416520366)
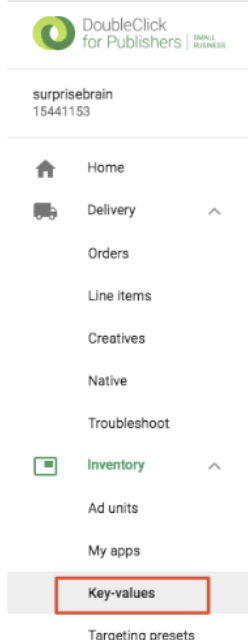
## Profiles APIトークンで使用するGoogle DFPの設定
1. Webブラウザで、Google DFPに移動します。
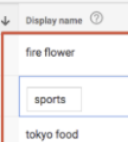
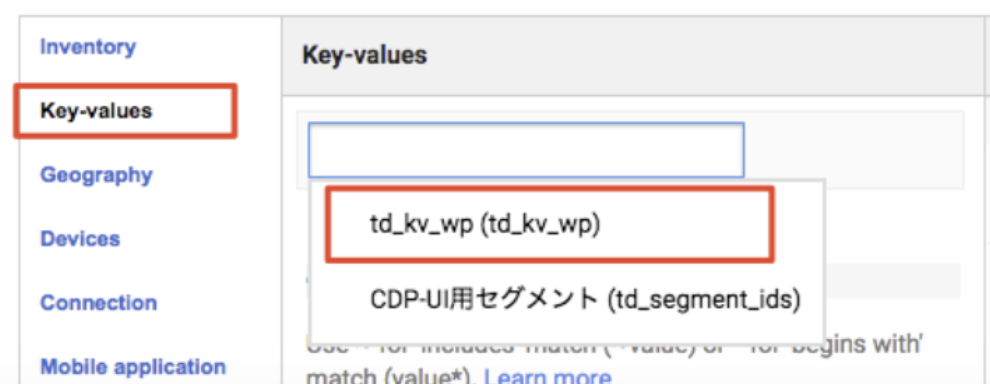
2. **Inventory** >**Key-values**に移動します。
1. New Keyを選択します。
2. NameとDisplay nameフィールドを入力します。
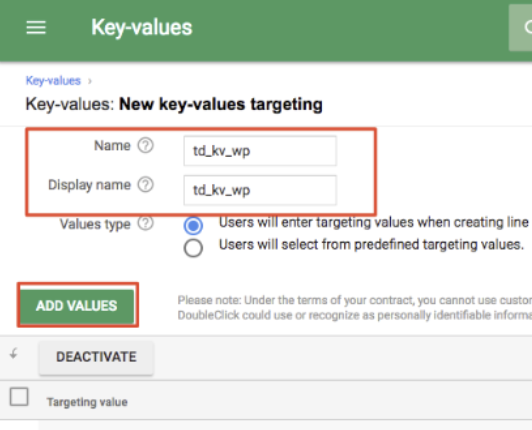
1. Add Valuesを選択します。
2. すべてのTreasure DataセグメントIDを1行ずつリストします。例: 257, 258, 259。
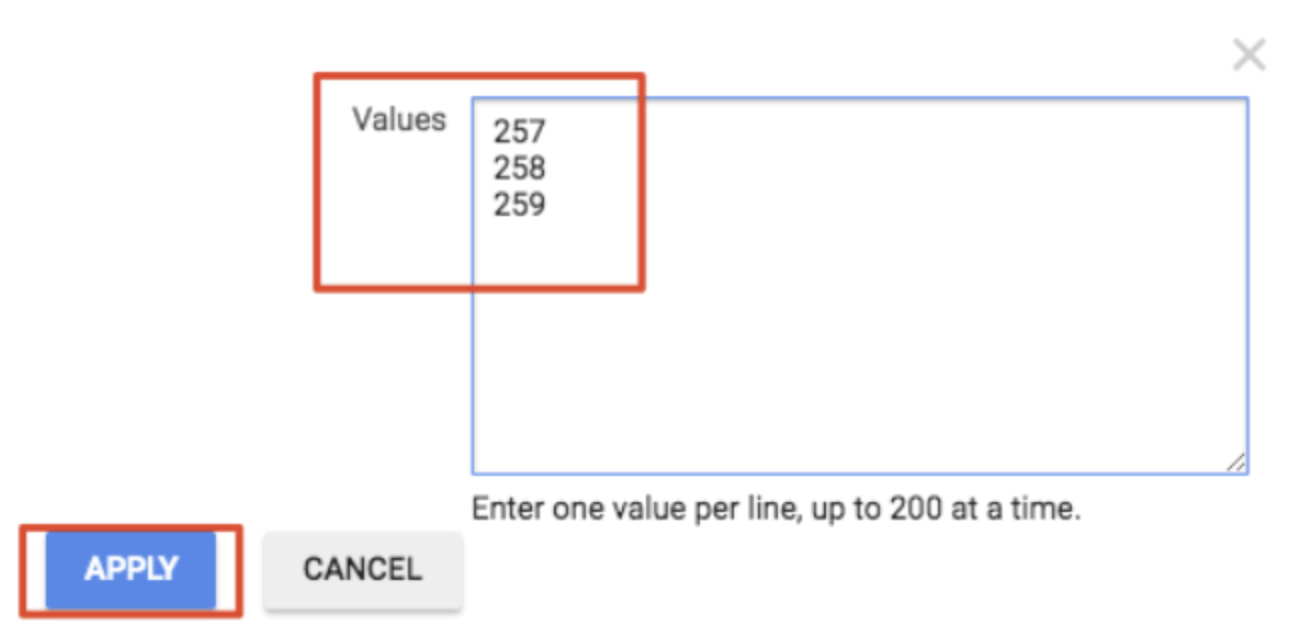
1. Applyを選択します。
2. オプションで、特定のセグメントIDにDisplay nameを追加します。
1. **Inventory** > **Ad units**を選択します。
2. Ad Unitを選択します。
3. CodeとNameフィールドを入力します。
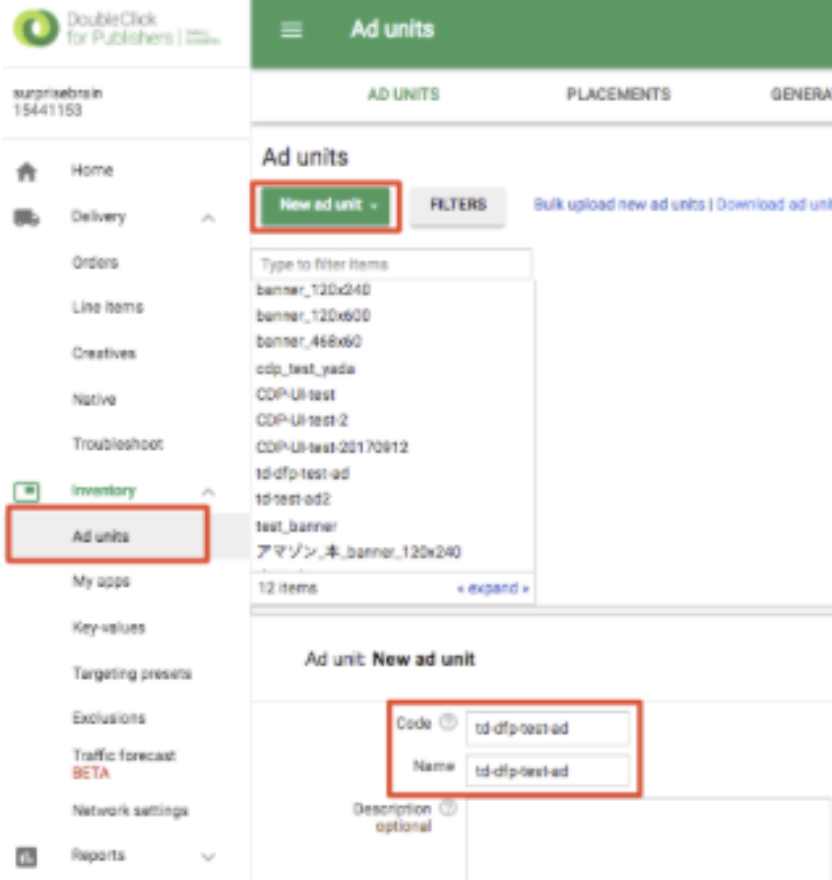
1. Saveを選択します。
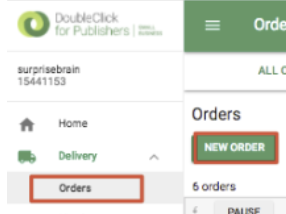
2. Delivery > Ordersを選択します。
3. New Orderを選択して新しいオーダーを作成します。
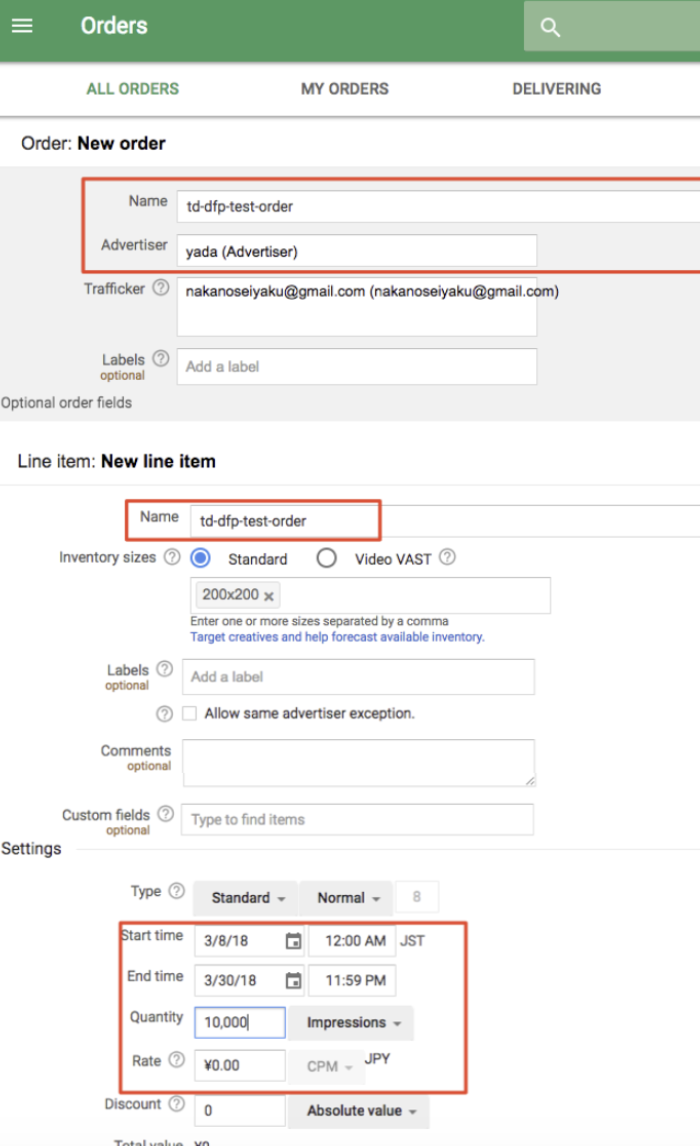
1. フィールドを編集します。例: Name、Advertiser、Start time、End time、Quantity、Rate。
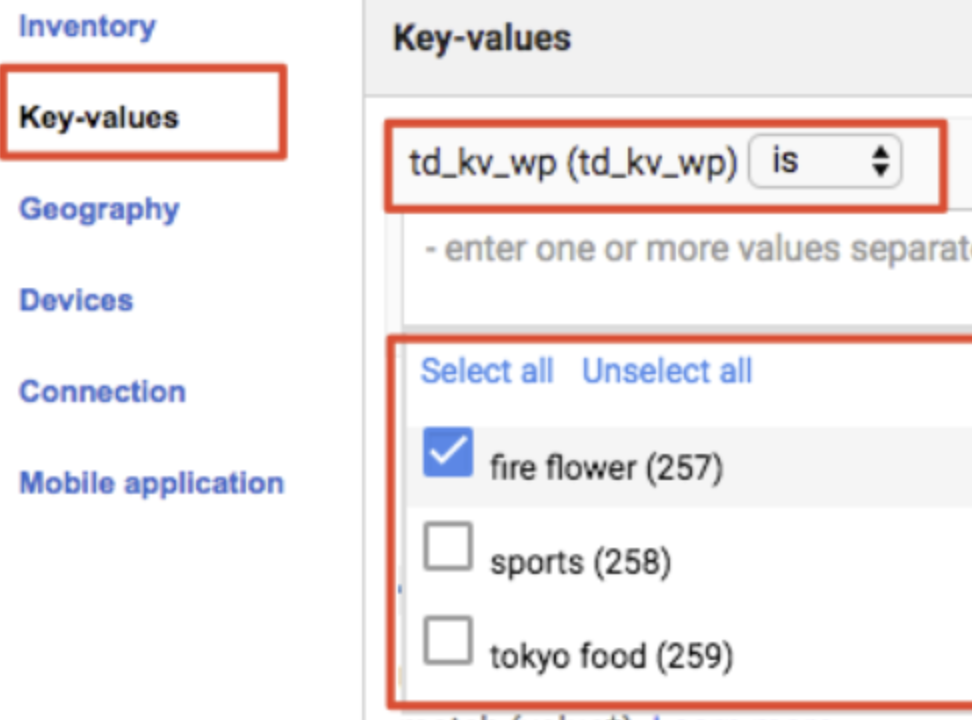
1. 下にスクロールしてKey-valuesセクションを見つけます。
2. 作成したKey-valueを指定します。例: td_kv_wp。
1. 作成したセグメントIDのリストを選択します。例:
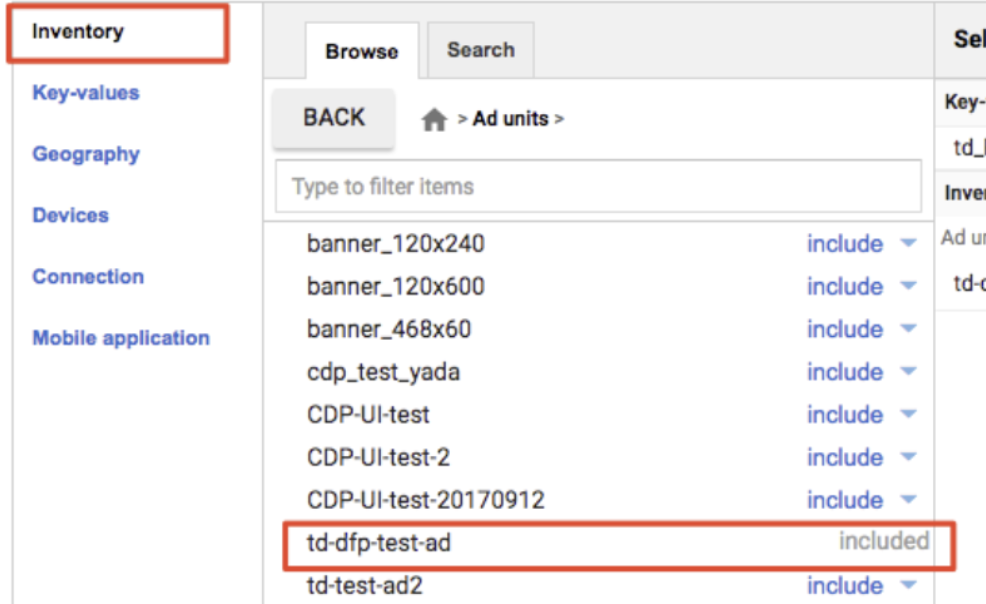
1. Inventoryを選択します。
2. 作成した広告ユニットを選択します。例: td-dfp-test-ad。オーダーオブジェクトが作成されます。例:
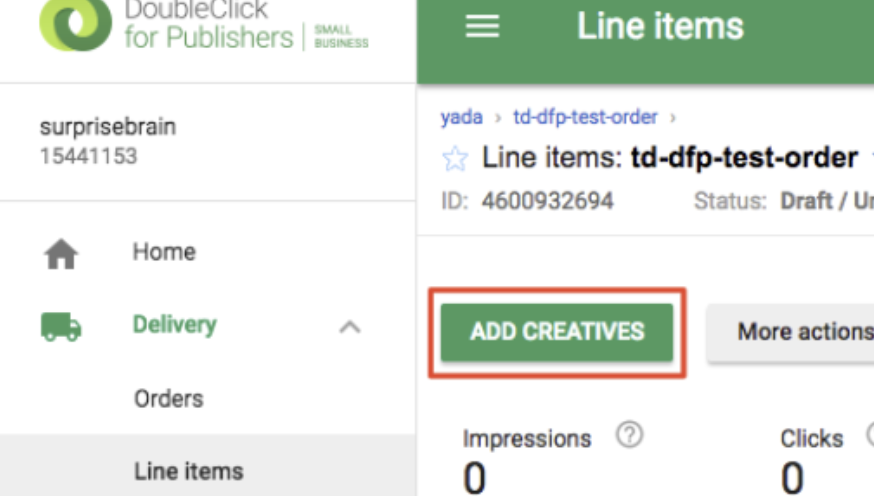
1. Delivery > Line itemsに移動してクリエイティブを登録します。
2. Add Creativesを選択します。
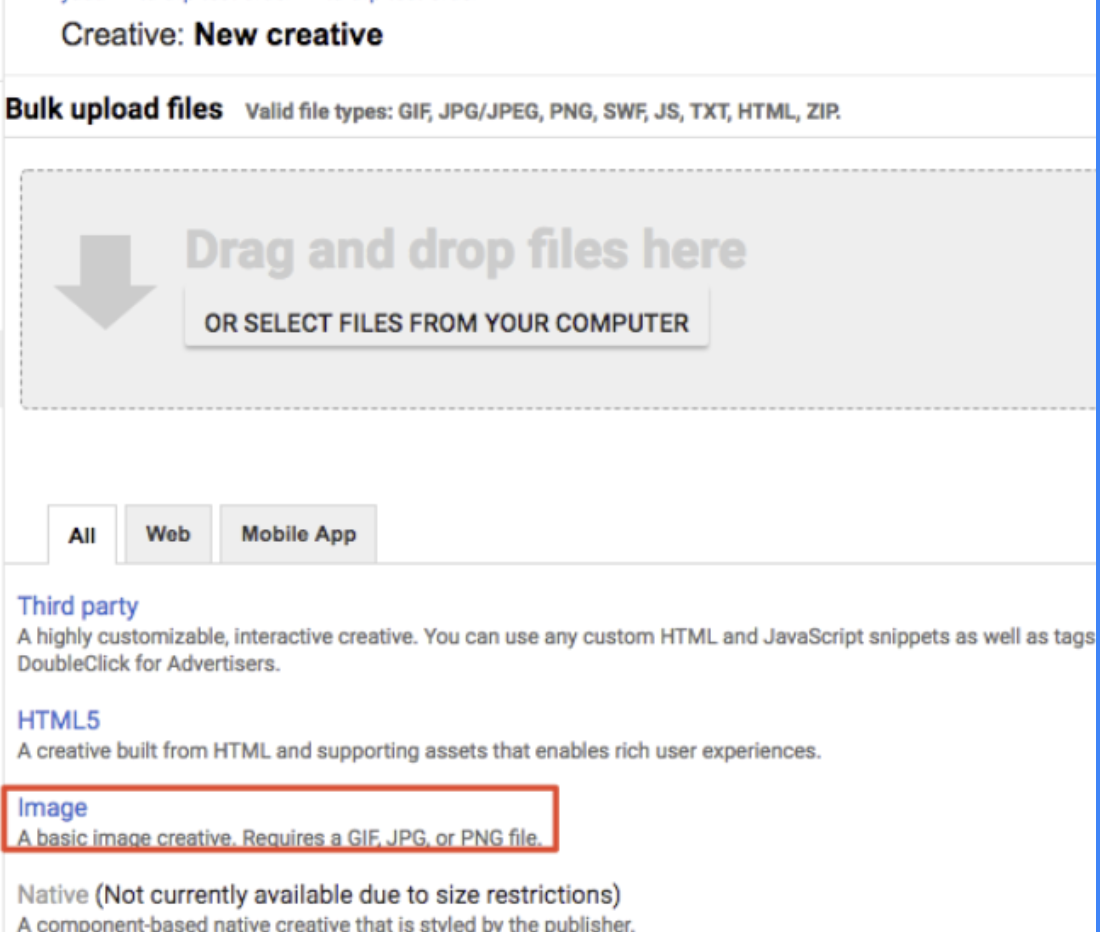
1. 作成したいクリエイティブタイプを選択します。例: 画像クリエイティブ。
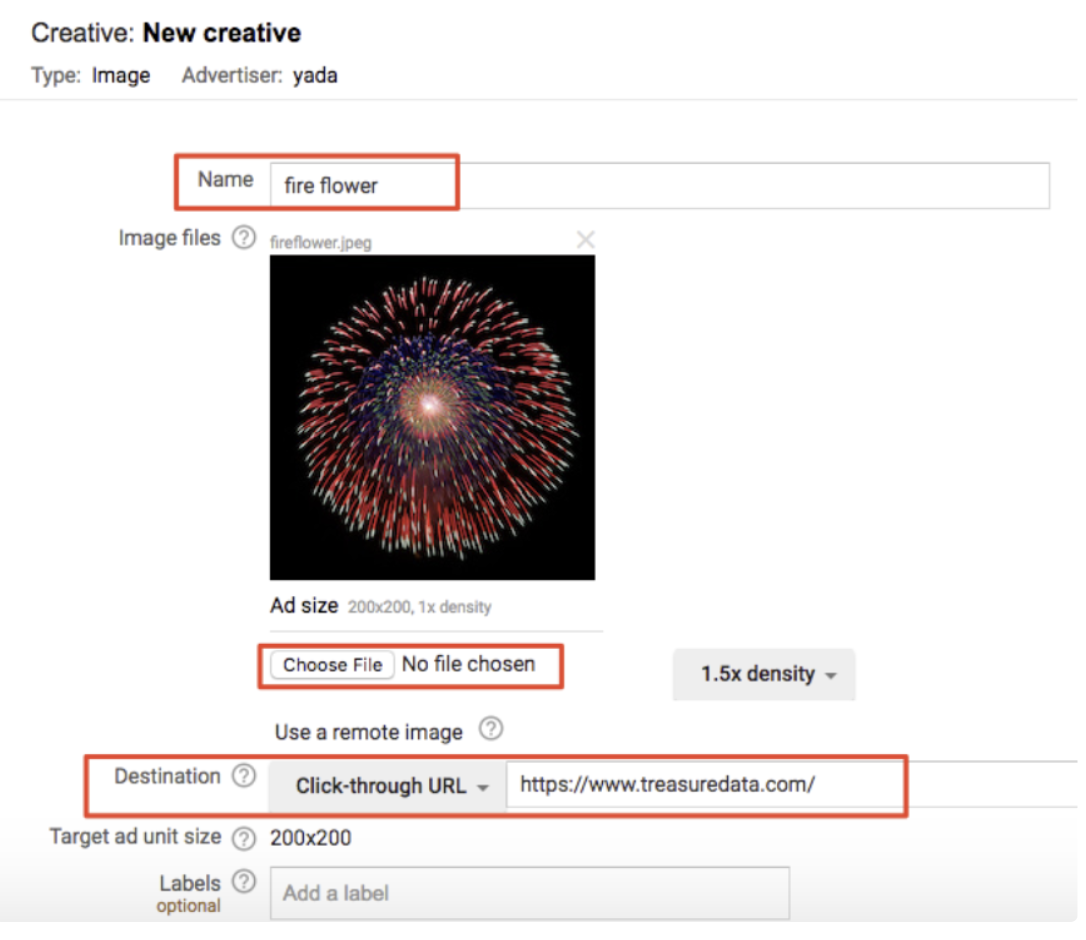
1. NameとDestinationを指定します。
2. クリエイティブ用の画像ファイルをアップロードします。
3. Destinationを指定します。例: https://www.treasuredata.com/。
## JavaScript DFPとTreasure Dataタグの作成
Google DFPのJavaScriptタグを生成するには:
1. Webブラウザで、Google DFPに移動します。
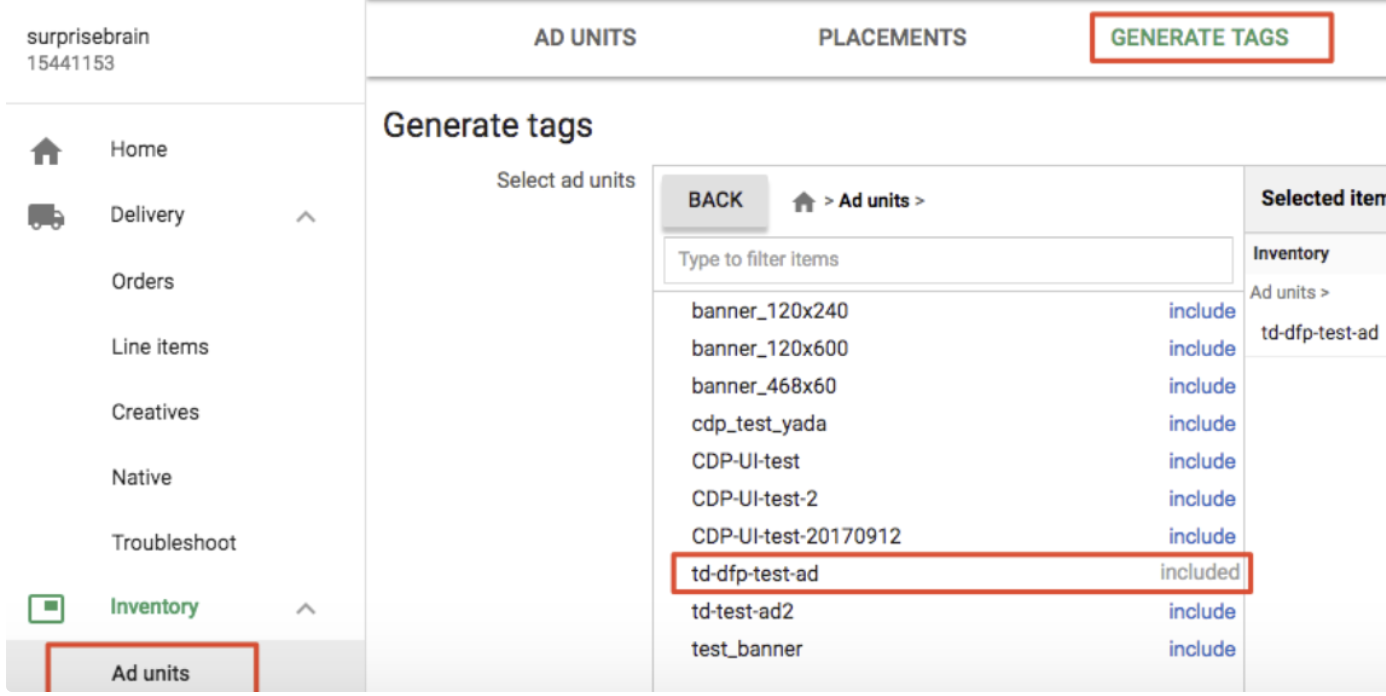
2. Inventory > Ad unitsに移動します。
3. Generate Tagsを選択します。
4. 作成した広告ユニットを選択します。例: td-dfp-test-ad。
1. Tag TypeとしてGoogle Publisher Tagを選択します。
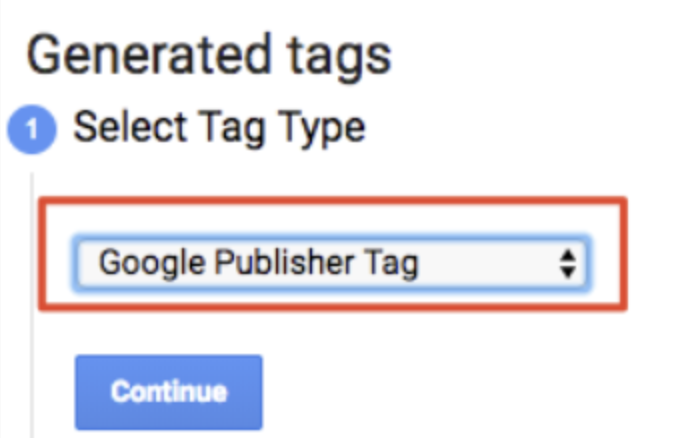
1. Continueを選択します。HTMLヘッダーとボディ用のJavaScriptタグが生成されます。
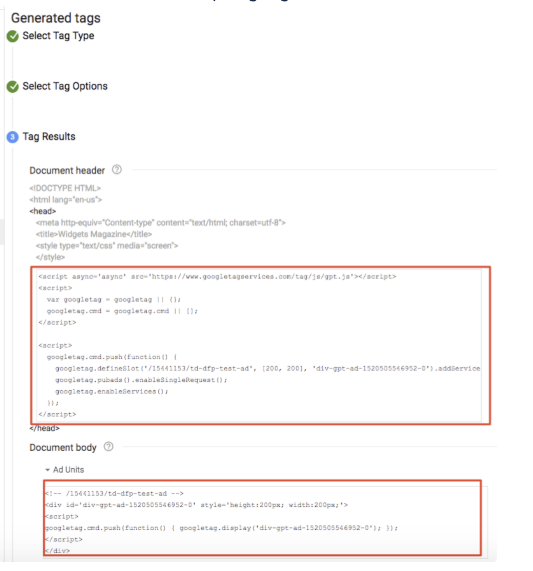
1. 作業を保存します。
**DFPタグとTreasure Data JavaScriptタグを組み合わせるには:**
1. Treasure Data JavaScriptとDFPタグを組み合わせたいファイルを開きます。
2. googletag.pubads().setTargeting()関数を呼び出して、Treasure DataのセグメントIDをGoogle DFPに渡します。
たとえば、以下のHTMLには、DFP JavaScriptタグとTD JavaScriptタグ間の統合コードが含まれています。
```html
Web Profiles API
Hello Treasure Data!